Technology has made communicating ideas with others easier, particularly in a formal setting. For example, PowerPoint is a widely used tool to present and communicate ideas to help people understand you better. It allows you to use icons, animations, pictures, and diagrams to convey your message and is an essential tool in many workplaces today.
Related Reading: How to Record Screen and Webcam at The Same Time
However, some situations might arise where you must record yourself presenting a PowerPoint. This article answers how to video record yourself presenting a PowerPoint and shares some easy methods to help you record yourself while presenting, with step-by-step guides. You can either use the default way, an online screen recording app, or OBS. Read on to find out more.
Method 1. Record Yourself Presenting a PowerPoint in the Default Way
Microsoft 365 for Windows allows you to record yourself presenting PowerPoint. You can capture your voice, make a video of yourself, and use ink gestures so your audience can follow as you present. If you are using Microsoft 365, this would be a perfect method since you don’t have to download or buy extra screen recorder software.
Follow the steps below to record yourself presenting a PowerPoint with your Windows built-in Camera app.
Step 1: After your slides are ready for presentation, select the “Record option” on the Record tab. You can select the icons at the top to turn your camera and microphone on or off.
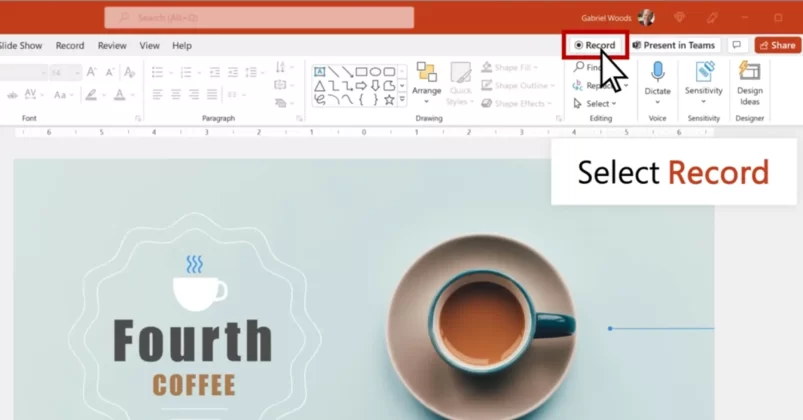
To do this, you choose the “Select more options” icon. You can also choose the type of background you want and change the layout option from the “Views” icon.
Step 2: On the top side of Powerpoint, you will find a camera icon on the record bar. Turn on it and you will see yourself appearing on the bottom right corner of your slide.

Step 3. When you are done with your settings, select start recording, and a countdown will begin to start the recording. To navigate around your slides, simply click the previous or next arrow.

The notes in your presentation turn to text at the top of the screen so that you can use it as a teleprompter as you record.
Step 3: When you are done, select Export, after which you can view the video by clicking “view” and “share video” that comes up next.
Method 2. Record Yourself Presenting PowerPoint Slides using FineCam
We’ve previously published a post telling how to add Google Slides as a webcam background for recording. In the article, we referred to our Fineshare FineCam. Yes, this program is also helpful for recording PowerPoint slides and your webcam at the same time.
Let’s get started to know how to make it.
Step 1. Install and launch FineCam on your computer.
Step 2. Choose a device and connect it to your computer.

Step 3. Go to the Content, and click Slides. After that, click to upload or drag the PowerPoint as a webcam background and then Apply.
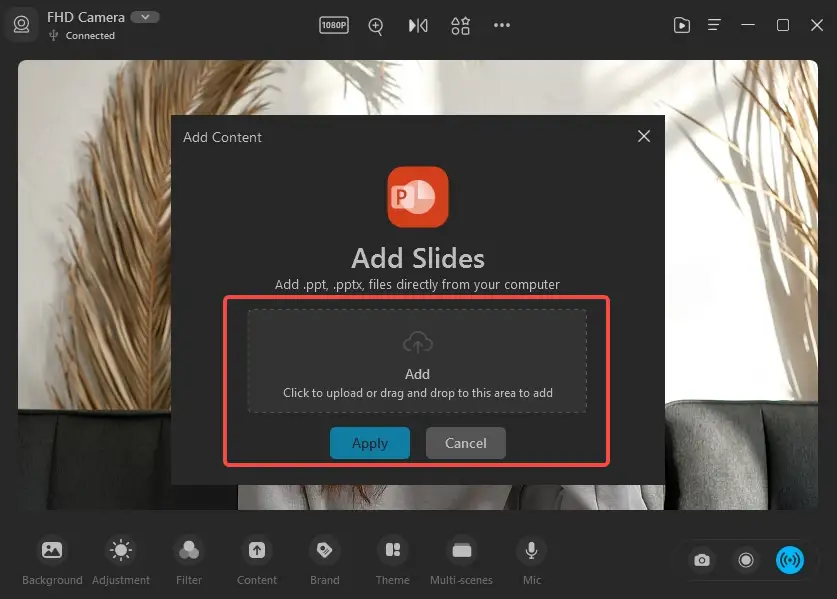
Step 4. Now the PowerPoint slides are successfully added as the background. And you can adjust your webcam frame to be suitable.

Step 5. You can record video presentations, or use the Virtual Camera feature to put the live video as a webcam source for your favorite video platforms like Zoom, Discord, etc.
Step 6. Once the recording is complete, you can find the recorded video in the Library.

To make it easier to understand how it works, you can watch this video tutorial.
Method 3. Record Yourself Presenting a PowerPoint using Online Screen Recorders
The second method to record yourself presenting a PowerPoint is by recording your screen using some free web applications. For example, you can visit screenapp.io as it allows you to record your screen and your webcam at the same time online. Want to know the best part? You do not have to download any additional apps when using the online screen recorder. Everything is done through the website.
It is free to record your screen and webcam for 15 minutes, and you get your recorded video saved to your computer as soon as you are done. To use the online web application, you can follow the steps below.
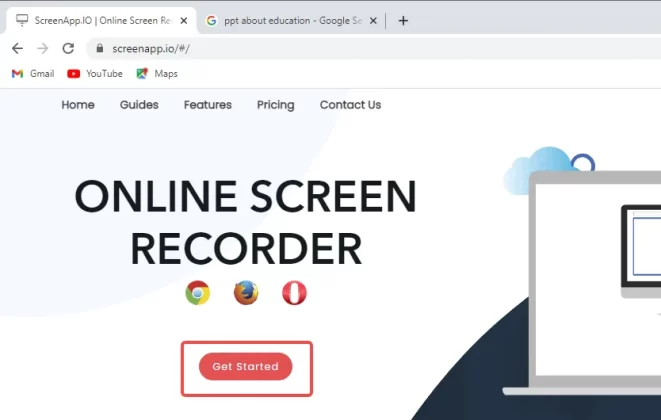
Step 1: Visit the website. Click on Get Started.
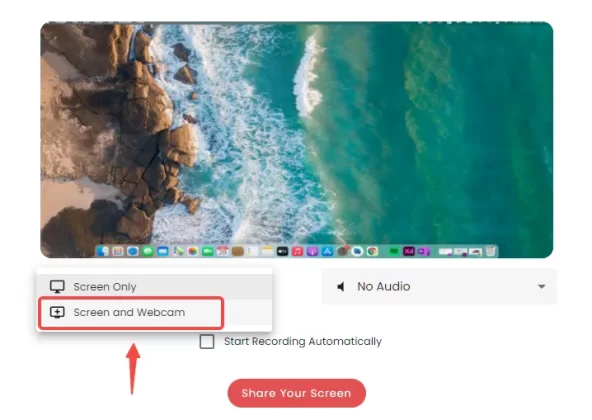
Step 2: Choose to record both your screen and webcam from the first drop-down menu. Choose the audio option you want from the second drop-down menu.
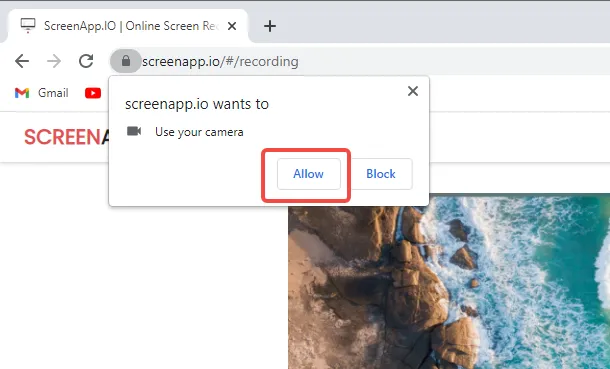
Next, allow this app to access your webcam.
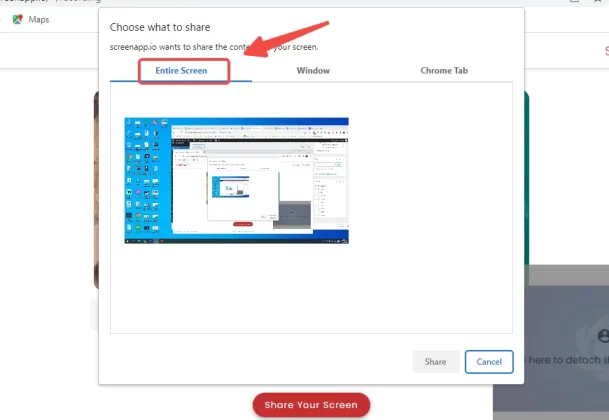
Step 3: Next, you have recording options to show the screen you want to be recorded. Ensure to keep the Window that you want to be recorded open at all times so that everything gets recorded.
Next, you click the “Share Your Screen” option to proceed. On the pop-up Windows, select the entire screen so you can record a PowerPoint presentation.
Step 4. Select “Start Recording” to begin your recording. Remember to launch your slide app and start the presentation.
Once you have completed your recording, click “Stop Recording”, and your recording will be automatically downloaded to your computer. You can view the recording in your library by clicking “View in Library”.
Method 4: Video Record Yourself Presenting a PowerPoint using OBS
You may be wondering, what is OBS Studio? OBS stands for Open Broadcasting Software. It is a free, open-source software for live streaming and recording. There are versions of OBS available for Microsoft Windows, macOS, and Linux. Now, to video record yourself presenting a PowerPoint using OBS, follow the steps below.
Step 1: Go to your preferred browser, and search for OBS. You’ll see it as the first suggestion. Click on it and select the operating system that you are using. It downloads automatically.
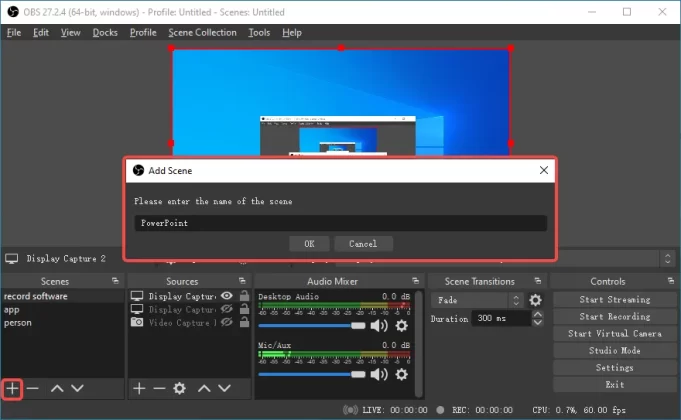
Step 2: After downloading, navigate to where the install file is saved and install the software. Launch the software by searching for OBS on your system. Add a scene.
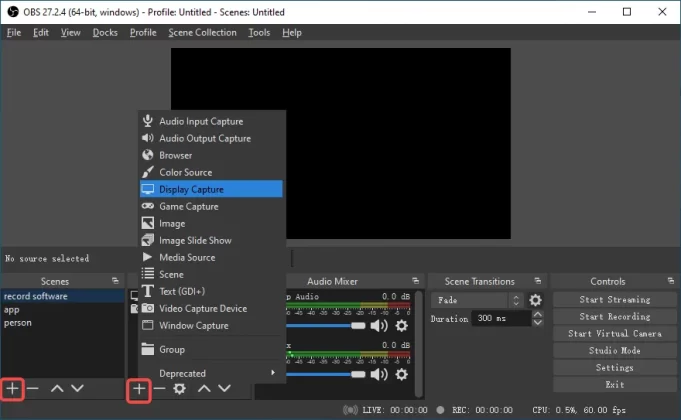
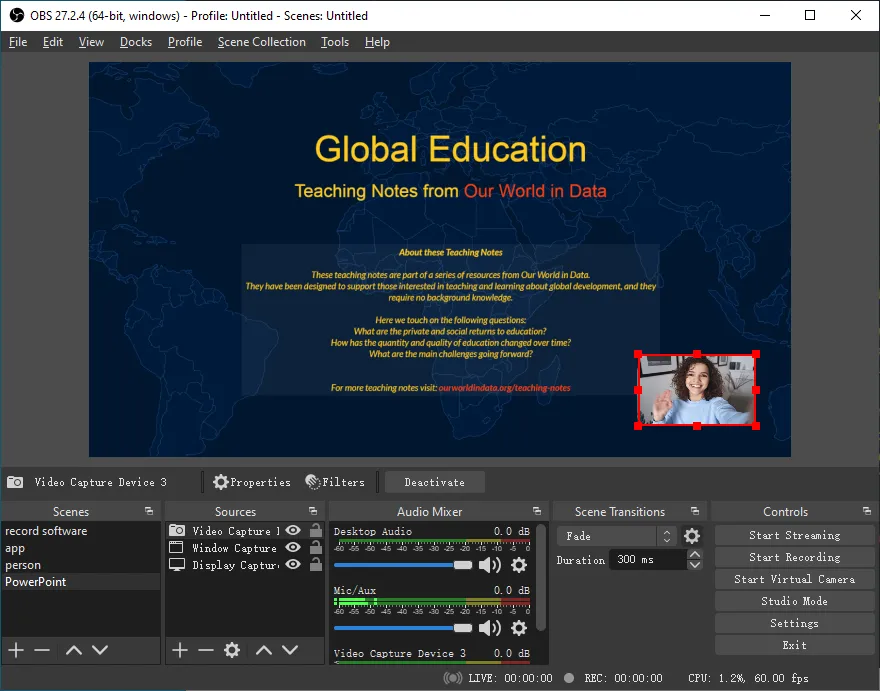
Step 3: When you open the OBS software, you will see a black screen. Right-click that screen and select Add > Display Capture.
Step 4: To add a video of yourself to the recording, right-click the recording interface of OBS. Select Add > Video Capture device > OK. You see a live video of yourself recording already, after which you can switch to whatever side you want to be.
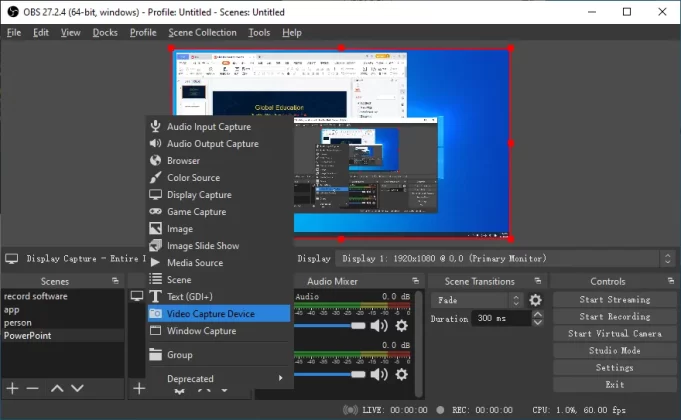
You can also make the video capture bigger or smaller by zooming in or out.
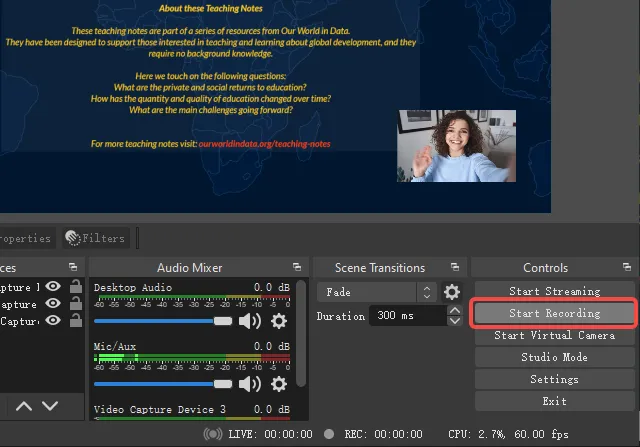
Step 5: After setting your preferences, click “Start Recording” in the Controls panel. When your recording is complete, click “Stop Recording”, which automatically saves to your desired folder. You can navigate to your PowerPoint presentation from your taskbar.
Click Settings > Output > Recording Path > OK to change where it saves your recorded folder.
Conclusion
That is it! 4 methods for you to video record yourself while presenting a PowerPoint. While this sounds simple, it is often easy to forget how to record yourself while presenting a PowerPoint. With this guide, you can record yourself smoothly by choosing your preferred method and following the steps listed above. Have an awesome future recording experience!