An external USB webcam adds to your confidence when attending video sessions. Yes, Windows laptops come with their camera, but are you really happy with the quality of their in-built camera, or do you seek out a better alternative? Besides, the camera is probably not working well, right?
If you have such a case, you may have bought a USB webcam, and need to learn how to use external webcams on windows laptops to enhance your video quality and resolution. Luckily, this tutorial offers a complete guide on using an external webcam on your windows laptop. Let’s get started!
Do you know that your iPhone actually can be turned into an HD webcam? In this way, you don’t have to buy an external webcam. Learn how to achieve it.
Part 1. How to Install USB Webcam on Windows Laptop?
Installing an external webcam is easy. Depending on your webcam type, it can either have an installation disk or none. Whichever is your case, the steps below will see you through. But first, ensure you’ve turned on your laptop.
- If the webcam has an installation disk, insert it on your pc. The wizard will automatically start. If it has no disk, connect the USB cable of the webcam to one of your laptop’s USB ports.
- Once connected, Windows will recognize the webcam and configure it for you. If your Windows fails to recognize the webcam, navigate to your device manager, and under the Imaging devices or Camera, right-click it, and choose to update driver.
- If that didn’t work, visit the manufacturer’s website and locate and install the needed driver to support the webcam.
- Mount your monitor. Now that the webcam is installed try to look for adjustable clips that came with the monitor. Clip the webcam to your laptop’s monitor and adjust it to suit your height. Furthermore, ensure you position it to point to your face.
That’s it! You’ve ‘handled the hard part. The next thing is to test the webcam to ensure it works.
Part 2. How to Test External Webcam on Laptop?
Testing your webcam before a meeting and after installing it is a crucial step. You can do so in three different ways, and we will cover them all.
To test the external webcam using your Windows in-built camera app:
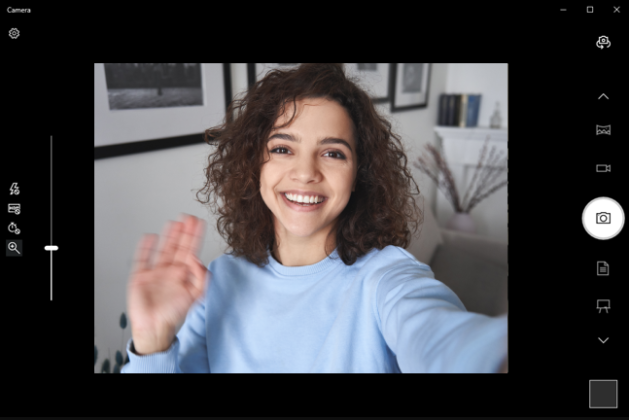
Test External Webcam using Camera App
- Open your camera app by clicking the start button, and on the search bar, type “Camera” and click the “Enter” key.
- If the camera prompts you to grant it access to your location, choose “Yes.”
- On the next screen, you should see yourself. If that’s not the case, then the webcam is not working.
To test the webcam using Skype:
- Every Windows laptop comes with skype. So, open your Skype app.
- Navigate to your profile and from the menu, navigate to Settings > Audio & Video settings
- You should see yourself under the camera preview in the “Video” section.
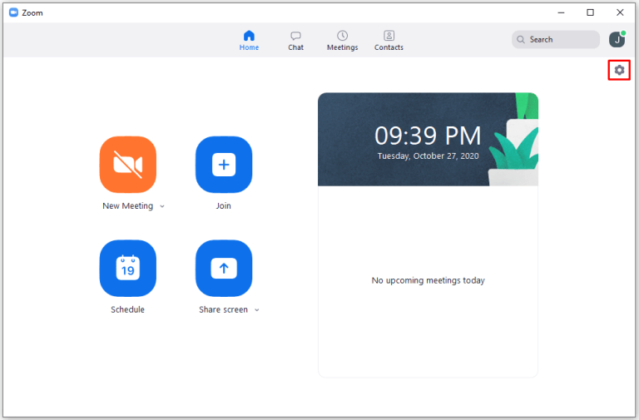
If you have a Zoom app installed, do the following to test your webcam:
Add Office Virtual Background to Zoom – Step 1
- Open the Zoom app and navigate to your profile.
- Open the “Settings” section from the menu.
- Under the “Video” tab, you should see yourself to confirm the webcam is working fine.
- You are now ready to attend your video sessions confidently.
Part 3. Use External Webcam as Default Camera for Video Chat
The in-built webcam offered by Windows is not the best, especially if you need to record videos or attend video meetings often. You need a webcam that provides advanced features like automatic tracking and panning.
We’ve already seen how to install a USB camera for windows. You can make it your default camera for video chat in two ways.
If you can view the webcam under devices and printers, do the following:
- Click the “Start” button, type “Control Panel,” and then hit the enter key.
- Click the “View By” drop-down at the top right corner and select small or large icons.
- Click “Device and Printers”.
- You should see the external webcam from the devices available.
- Right-click on it and click the option to set it as default.
If that didn’t work, don’t panic! Proceed with the next option below to disable the in-built camera.
- Click the “Start” button and enter “Device Manager.” Click the enter key.
- Scroll down the list to the camera section.
- Right-click on the in-built camera and choose the option to disable it. Do so for any other webcam you have except the one you want to keep using.
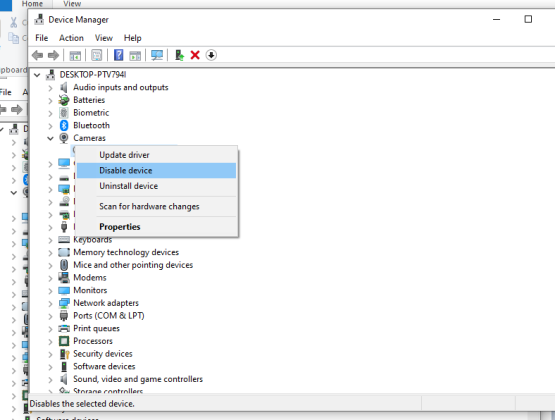
Set External Webcam as Default for Video Chat
The next time you need to open a video chat like Zoom, Windows will use your desired external webcam as the default one.
Conclusion
Investing in a webcam is great for enhancing your camera’s resolution and avoiding the hassle of using a camera that’s not working. It’s embarrassing when people can’t see you in a video call or meeting.
We’ve covered how to install a USB camera for Windows laptops and make the external webcam your default for video chat. It’s time to up your webcam game!