It is frustrating to experience a camera not working on a Lenovo laptop, especially if you are in the middle of a Zoom meeting or other important activity. But the good news is that most of these camera issues result from software and not hardware.
Related Reading: How to Turn Phone into a 1080p HD Webcam
That means you can solve the issues with just a click of a button quickly and effortlessly, provided you have an arsenal of tips on how to go about it. Luckily, this guide equips you with the 7 best pro tips to fix your Lenovo computer issue. Let’s get started!
Part 1. Why is My Lenovo Webcam Not Working?
There is no main reason as to why your Lenovo webcam is not working, but there are several probable causes, including:
- The camera is not enabled in the current program you are using.
- The program you are using fails to recognize the camera.
- Another program may be using the camera.
- Your webcam drivers are outdated or missing.
- Your privacy settings or antivirus software is blocking the camera.
- A recent Windows 10 upgrade failed to install device drivers, compelling you to install such drivers manually.
Part 2. What To Do If Your Lenovo Laptop Camera is Not Working?
There are a few tricks you can use when your Lenovo integrated camera is not working, as we will see in this guide. The best part about these tricks is that you don’t need any hardware or prior knowledge. Just have your laptop, and you will be back to using it in a few minutes!
Method 1: Use Camera Privacy Settings
Check your Lenovo camera privacy settings using the steps below:
Step 1. Open your Camera Privacy settings.
Step 2. Enable the Allow apps to access your camera button.
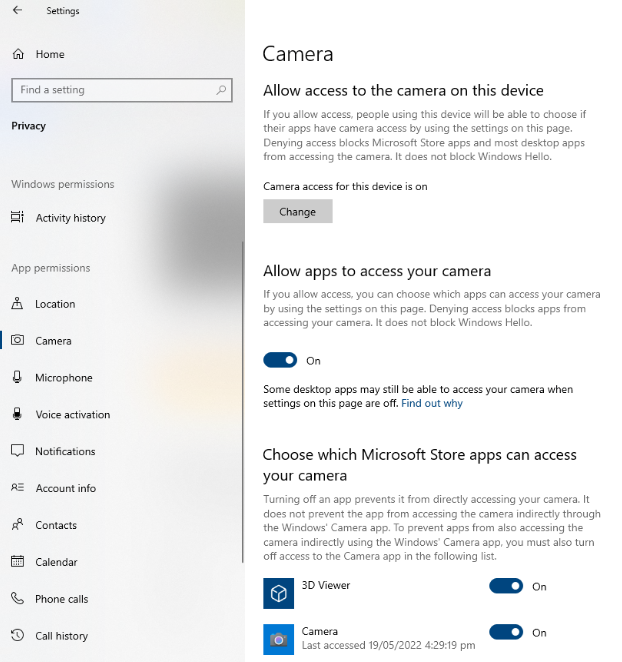
Step 3. Test if the camera has started working.
Well, I hope the camera is now working! If not, continue reading to find out more tips.
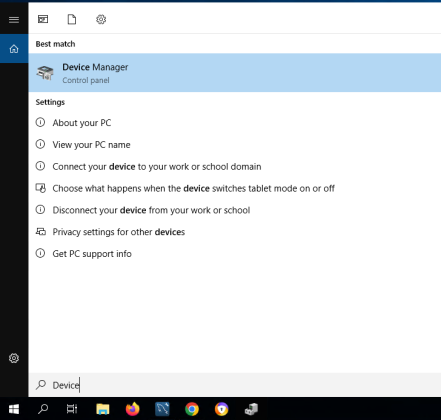
Method 2: Use Device Manager
Step 1. Click the Start button to open the Device Manager.
Step 2. Scroll down and select the Imaging/Camera option.
Step 3. Right-click on the Integrated Camera option and select the Uninstall device button. But first, ensure the option for deleting the driver software remains unchecked.
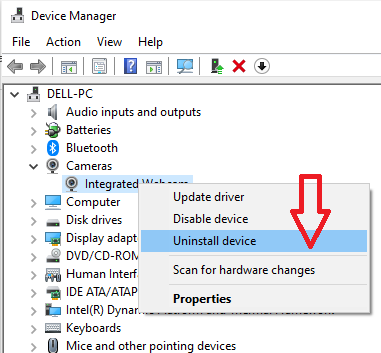
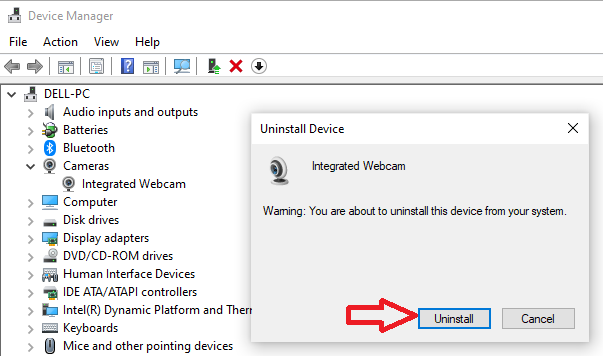
You will notice the Camera/Imaging option has disappeared.
Step 4. Navigate to Action, click on it, and select Scan for hardware changes.
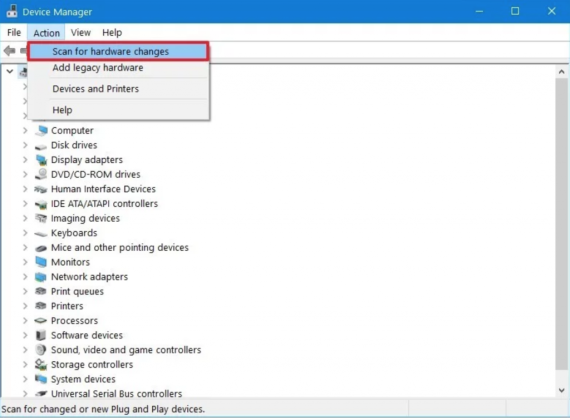
The Cameras option will show up again, open your camera and see if it works.
You may be required to restart the laptop for the changes to effect.
Also, if drivers are outdated, they can cause the Lenovo camera to not work in Windows 10.
To update the camera drivers, use the steps below.
Step 1. Right-click on Integrated camera and select Update driver.
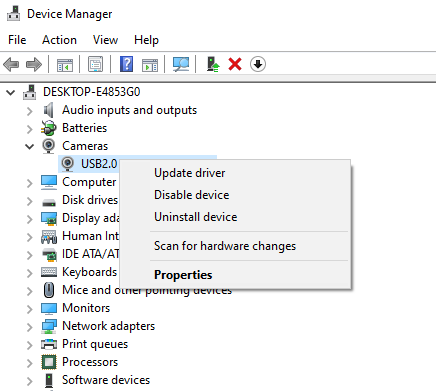
Step 2. Click on search automatically for the updated driver software option, and allow them to install.
If the driver notifies you that it is already up to date, you can manually visit the Lenovo website and download the driver, then install it. Finally, restart your computer to fix the problem.
Method 3: Check if your Camera is Enabled
Sometimes, when your camera works in some programs while others do not, the problem can be that you have not enabled the camera for that specific program in which the camera is not working. Therefore, you need to follow these two simple steps to confirm if that is the case.
Step 1. Open the specific program, for instance, Zoom, and open its video settings menu.
Step 2. Ensure Lenovo EasyCamera is the default camera.
Method 4: Remove the Lenovo Settings App
Are you still stuck? Try removing the Lenovo Settings app, and it may do the trick.
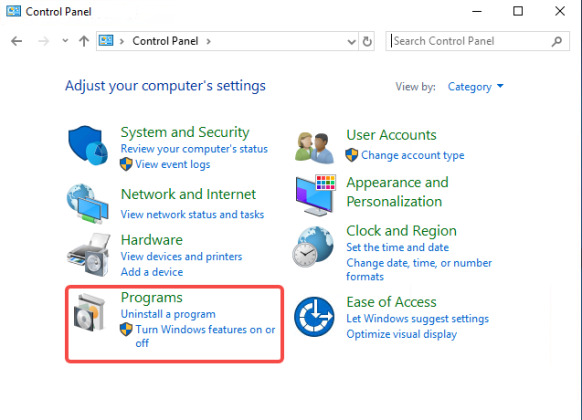
Step 1. Go to Control Panel on your Windows laptop.
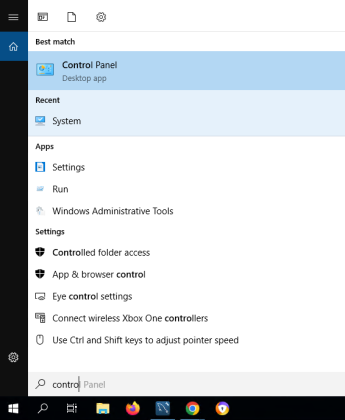
Step 2. Navigate to the Programs option and click on Uninstall a program.
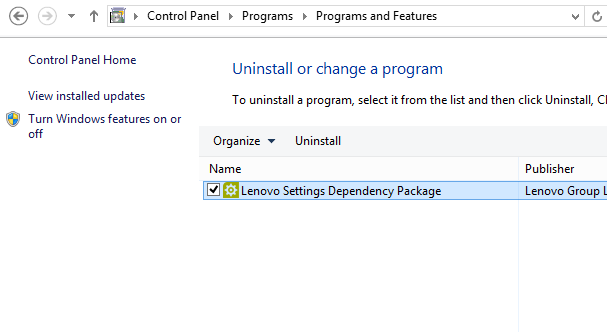
Step 3. Click on Lenovo Settings Dependency Package, then click the uninstall option.
Step 4. Restart your computer and check if the camera is working.
Method 5: Use your Phone as a Temporary Webcam
If the built-in camera of your Lenovo laptop doesn’t work, why not take the smartphone out of your pocket and use it as a temporary webcam? Whether it is an iPhone or Android phone, you can easily turn it into a webcam with some free webcam app.
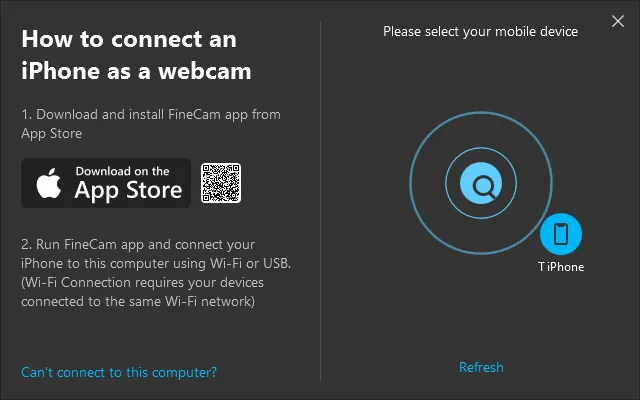
For instance, using the free version of FineCam, you can easily connect an iPhone camera to a computer, whether a Windows or a Mac.
Step 1. Download and install FineCam from the App Store.
Step 2. Install the FineCam app on your laptop from their official website.
Step 3. Launch the FineCam app on your iPhone to broadcast the Wi-Fi signal, then follow the steps on the screen to connect the iPhone to your computer using Wi-Fi or a USB.
Step 4. Start using your iPhone as a webcam and start a video chat on your computer.
Method 6: Use Your Digital Camera as a Webcam
Not all digital cameras are used as webcams. But if your camera has an HDMI port, you will require a capture device, and it will work.
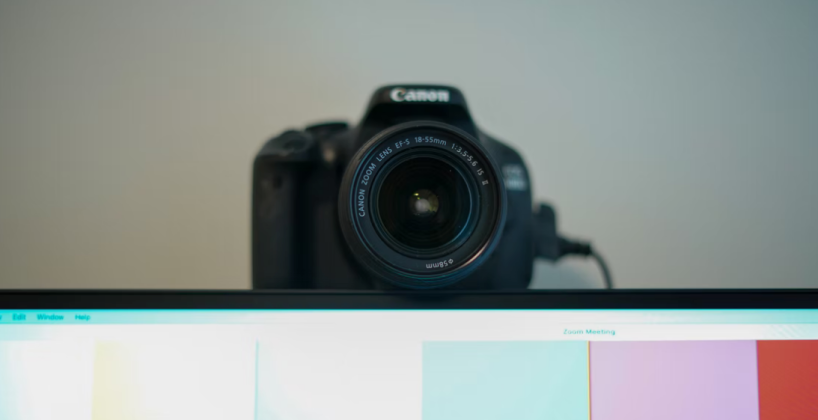
The following steps will guide you on using a DSLR as a webcam alongside a capture device.
- Insert the HDMI cable into your digital camera.
- Connect the HDMI cable to a capture device.
- Connect the capture device to your computer via the USB port.
- Turn on your camera after setting it to video mode.
- You can now open your streaming app and select USB video as your video source.
There you have it! I believe now you have managed to fix the Lenovo camera not working.
Besides HDMI, there are other free methods you can try to use your DSLR or mirrorless camera as a webcam for your Lenovo computer.
Method 7: Buy a New Webcam
If there is no other method working for you, the other option you can try is buying a new external webcam. A new webcam will enable you to fix the issue of the Lenovo camera not working and be able to stream video in various apps without any difficulty.
Conclusion
Lenovo camera not working can be frustrating, especially when you are in the middle of something important. But this article has discussed the various effective ways to help you solve the issue quickly. Anytime you encounter a camera problem, the methods discussed above are the best and easiest!