As the biggest online video platform, YouTube has a wide range of audiences from all over the world, and videos for various interests can be found here. And for many reasons like online study or making subtitles, transcribing videos is becoming more and more popular for people who watch videos on YouTube.
Typing manually to transcribe videos is slow and tedious, and it costs more, not many people transcribe like that nowadays. Here we have found 4 simple ways how to transcribe a YouTube video to save both your time and energy. And a tip about changing video voice if you are interested in making your own videos.
Why Transcribe YouTube Videos?
There are various reasons from people have different interests and needs.
- If you are a student who studies from videos or just trying to learn something online, transcribing videos can help you take notes while watching videos. You can focus on the videos without stopping in the middle and taking notes, and check the transcript later to see if there’s anything you missed.
- If you are making your own videos and find it too difficult to add subtitles manually, transcription can help you. After transcribing your video, you only need to edit the transcription a little and then use it as video subtitles. This method can save you a lot of time and is easier to do.
- Since YouTube has a worldwide range of uploaders, sometimes it may be difficult to understand what they are saying in the videos due to the accents and different languages. But with a transcript, you can easily understand what they said by comparing the transcript with the video to have a better experience.
- Transcription is a useful tool for people with hearing difficulties. With that, they can also enjoy videos since they can read the transcribed voices and sounds directly.
- If you need to watch a YouTube video for business purposes, transcription can help you too. It can highlight the key points in online meetings or lecture videos, and after watching, you can check the transcription to find the information you need.
#1. How to Transcribe a YouTube Video with Its Own Transcript Function
The fastest and easiest way to transcribe YouTube videos is by using its transcript function, and it’s completely free to use.
This function is attached to most YouTube videos and the whole transcribing process is fully automatic. However, this built-in function doesn’t work nicely for every video because the accuracy isn’t very ideal. There could be some mistakes in transcription, so you may need to be careful when you check the results.
Step 1. Find the video you want to transcribe on YouTube.
Step 2. Click the dot button to see extra options.

Step 3. Click the Show Transcript.

After the 3 simple steps, the transcript of the video you are currently watching will be auto-generated and displayed on the right side of the video. It also provides timestamps by which you can click any transcript line to locate its place in the video.
?? Pros:
- Easy and fast to get a video transcript.
- Timestamps allow you to precisely locate any part of the video.
?? Cons:
- Lack of other functions such as highlighting a line.
- The accuracy isn’t very good.
- Transcription can’t be saved as a local file.
- Not every YouTube video has this function.
#2. How to Transcribe a YouTube Video with Google Docs
Not every YouTube video has the built-in transcribe function, you will have to look for another method when this situation happens to you. Using Google Docs to turn a YouTube video to text is a good choice.
Google Docs is also free to use, and the transcription can be done online. There are more steps to do if you need to use this method, an available microphone is also needed.
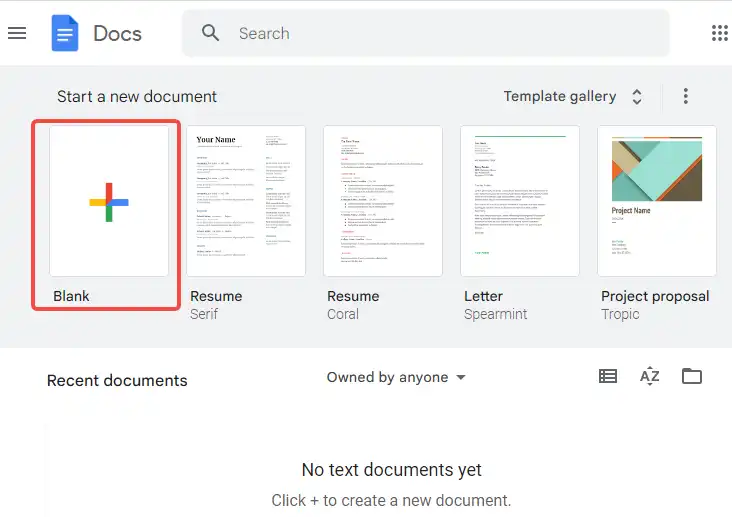
Step 1. Go to Google Docs and create a new blank document.
Step 2. Enable the Voice Typing Function in Tools.
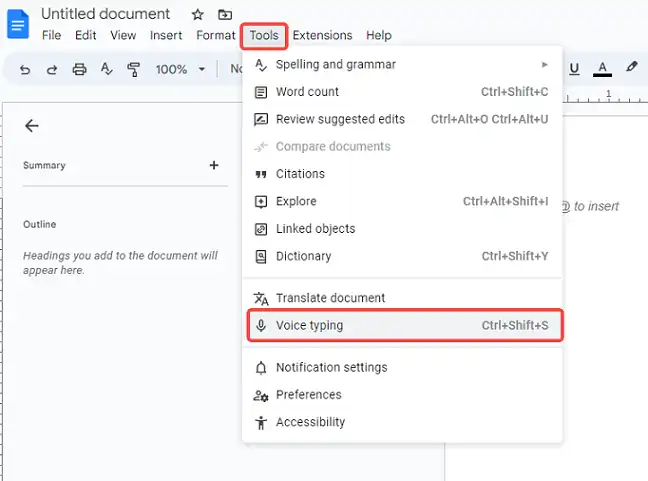
Step 3. Open a new browser window and enter YouTube.
Step 4. Find the video you want to transcribe.
Step 5. Play the video and click the speak button at the same time
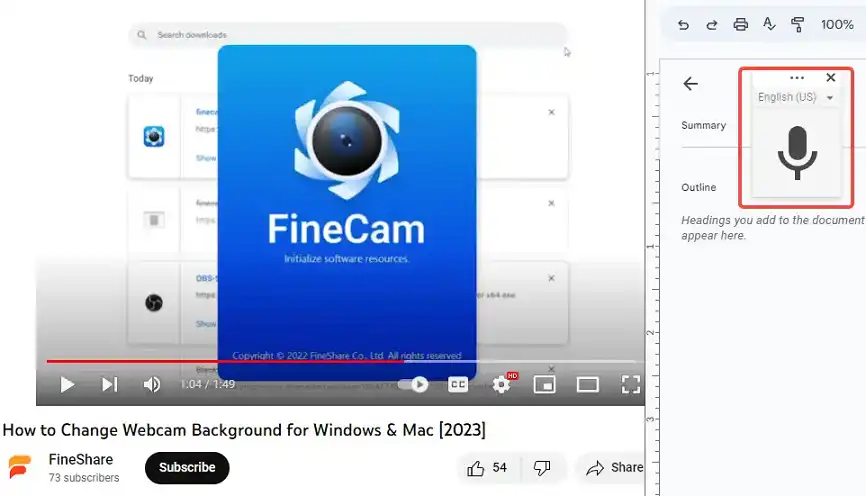
Other factors could affect the final quality of the transcript. For example, the distance between the microphone and the speaker, the video volume, and the audio speed of the video.
It’s also recommended to resize the two browser windows and make each of them take half of the screen so you can monitor the transcription better.
?? Pros:
- Transcribe any YouTube videos online for free.
- Support editing generated text.
?? Cons:
- Can’t be done without a microphone.
- The accuracy is very bad.
- Slow transcribe speed.
#3. How to Transcribe a YouTube Video with Veed.io
Veed.io is an online tool that can help you to transcribe YouTube videos. You can edit the uploaded video directly, but you need to sign up for this website to save the edited video.
Except for the transcribe function, there are other tools on Veed.io available for you to edit your videos. For example, you can add text or animated stickers, and nearly 100 filters and effects for you to choose from. If you are interested in making videos, this website can meet most of your needs on its own.
Step 1. Upload your video on Veed.io.
Step 2. Choose Auto Subtitles to generate a transcript.
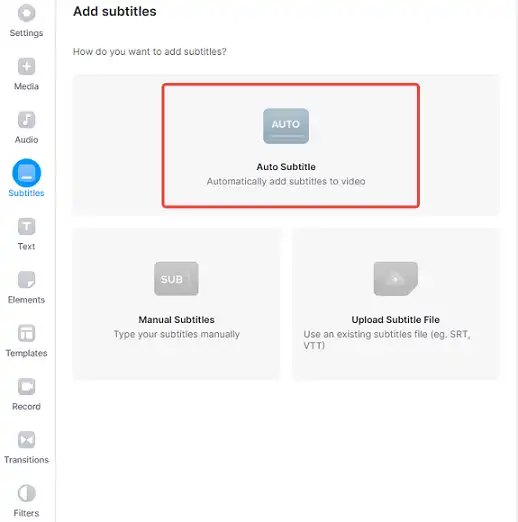
Step 3. Edit the subtitles and click Done to save.
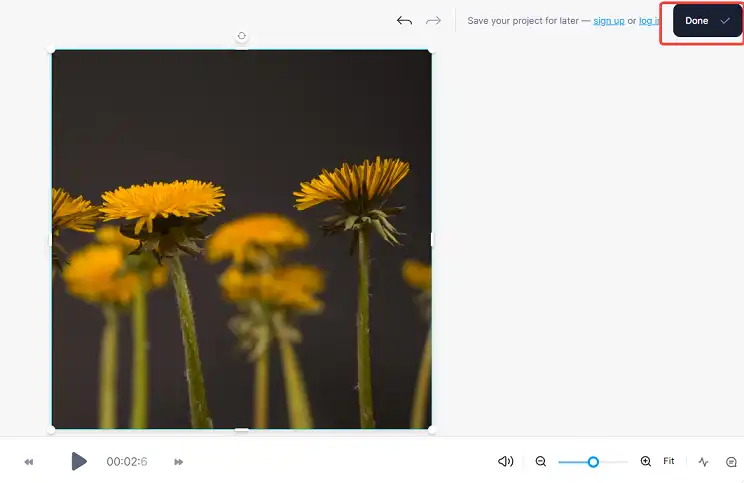
?? Pros:
- Transcribe videos online.
- Free to use.
- Other useful tools to edit videos
?? Cons:
- Saving edited files requires signing up first.
- Only supports TXT output format.
#4. How to Transcribe a YouTube Video with FineVoice
If you want both high accuracy and fast speed when transcribing videos, you may need third-party software to do that.
FineVoice is a versatile AI voice studio integrated with multiple functions related to audio, including the speech-to-text function. FineVoice supports most audio formats like MP3, WAV, and languages like English.
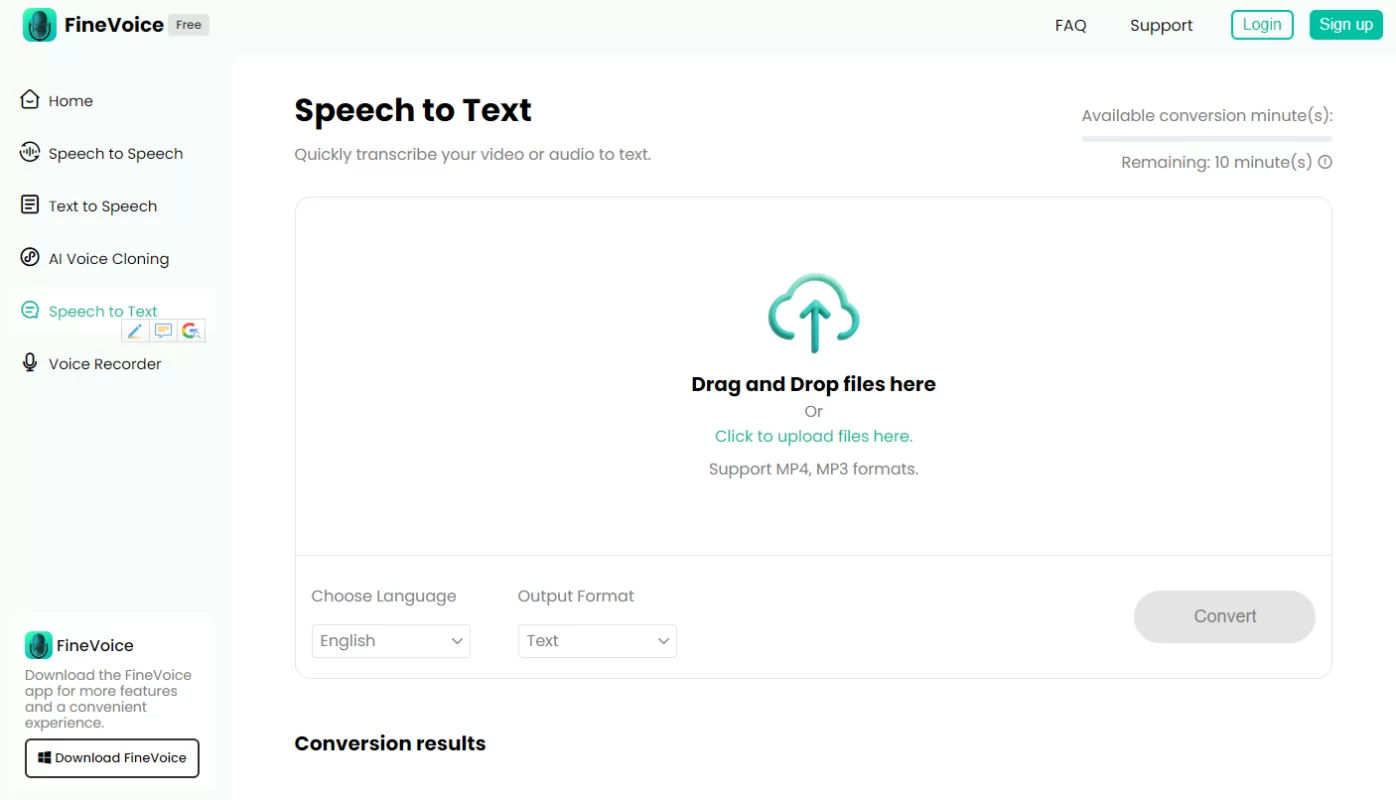
FineVoice Speech to Text can convert audio files to TEXT, SRT, VTT, and JSON. If you don’t know how to transcribe a YouTube video into text, this online free tool could be a handy tool for you.
Step 1. Download the YouTube video you want to transcribe.
Step 2. Go to FineVoice Speech to Text and sign in so you can use the necessary functions.
Step 3. Choose Drag and Drop files here or Click to upload files here in the middle of the window.
Step 4. Proceed to Choose Language and Output Format.
Step 5. Click Convert to start the conversion.
?? Pros:
- Fast in transcribing.
- High accuracy.
- Multiple input and output formats are supported.
- Allow you to save transcription as local files.
- Can be used to transcribe any downloaded YouTube video.
- No need for external equipment.
?? Cons:
- Needs an internet connection.
Tip: How to Change YouTube Video Voice with FineVoice
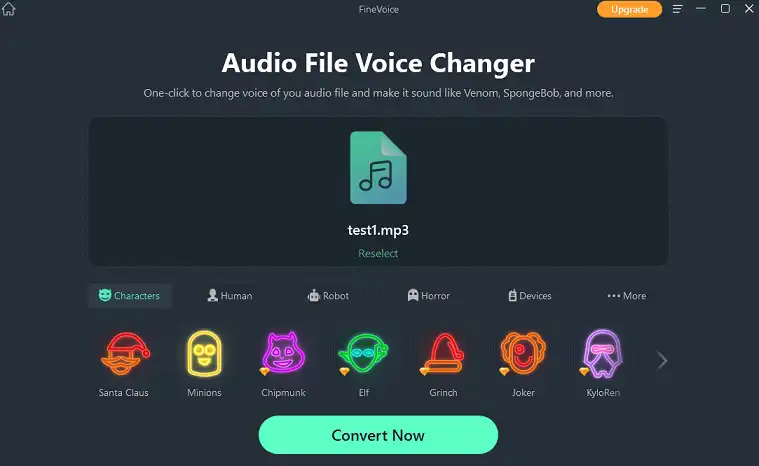
For anyone who likes to make videos and wants to be a YouTuber, FineVoice can do more than transcribe. If you are interested in changing the voices in your videos to make them funnier and attract more viewers, the Audio File Voice Changer can help you.
This function changes the voices contained in audio files, and the changed files can be used as voiceovers. Just one click, and the software will finish the reset. There are over 30 voice effects that you can use, such as Santa Claus, Darth Vader, and SpongeBob.
Conclusion
No matter why you need to transcribe a YouTube video, it’s always a wise choice to have a good tool to help you with the heavy work. With a transcript, you can save time in searching for important parts of videos, review the knowledge in the video more conveniently, or have a better understanding of video content. Hope the listed tools above can help you, and have fun exploring the world of YouTube videos.

