Let’s face it, adding filters to our photos while posting them online comes as a natural instinct now. From Snapchat’s famous puppy filter to scenic aesthetic effects, and even TikTok’s incredible transitions, we’ve come a long way.
We mostly use mobile apps to add filters to our photos and videos. But there’s one thing you didn’t know, you can also add a filter on your Macbook too by using the MacBook camera filters on the webcam.
Also Read: 3 Free Ways to Blur Webcam Background on Mac
In this article, we will look at 5 ways to add filters to a MacBook camera. Let’s get into the details.
Part 1. How to Add Mac Camera Filters using FineCam
Besides Snap Camera, there are some other virtual camera applications that you can use to add camera filters. Here we will be adding a camera filter using FineCam. It is virtual webcam software that you can use to add cinematic filters, logos, overlays, backgrounds, etc.
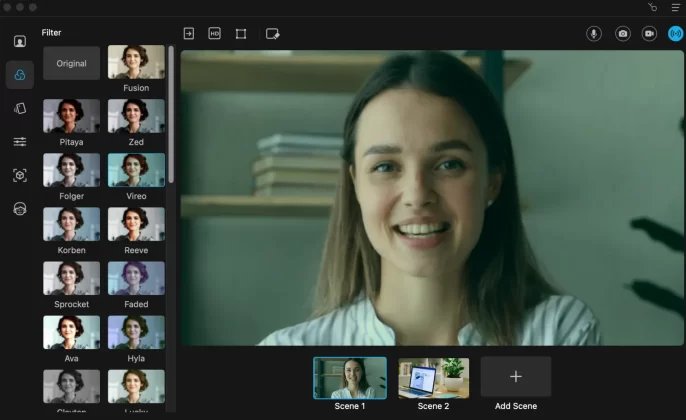
You can browse from a vast range of filters to put it on your webcam video. The steps to add camera filters using FineCam is easy. Run FineCam in your system after downloading, and click Filters on the left sidebar. And then browse the filter categories and apply them to your live video.
Part 2. How to Add MacBook Camera Filters Online
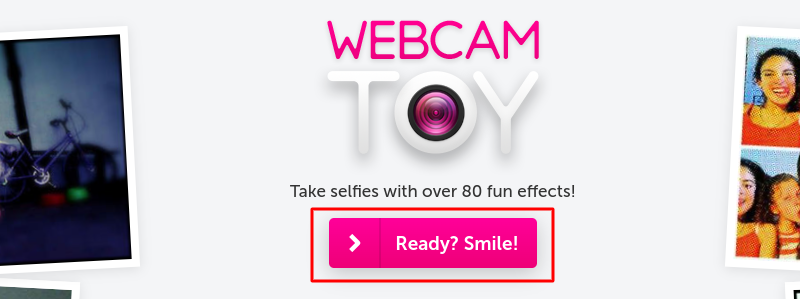
The best part about adding MacBook camera filters online is that you don’t have to download a separate app. Webcam Toy is a free tool available online to add filters to your picture on a MacBook. This online tool has more than 60 filters that you can apply to pictures using your webcam online.
It is like a photo booth provided by Apple but with many camera effects. With a few clicks on the screen, you can take pictures online with a webcam and apply a filter to them. After that, you get the option to either download the picture in your system or directly share it on social media platforms such as Facebook and Twitter.
Below are the steps to add a MacBook camera filter online using Webcam Toy.
Step 1. Open your web browser and type Webcam Toy or click here.
Step 2. Now, in the center of the screen, you will see a Pink Button “Ready? Smile!” Click on it.
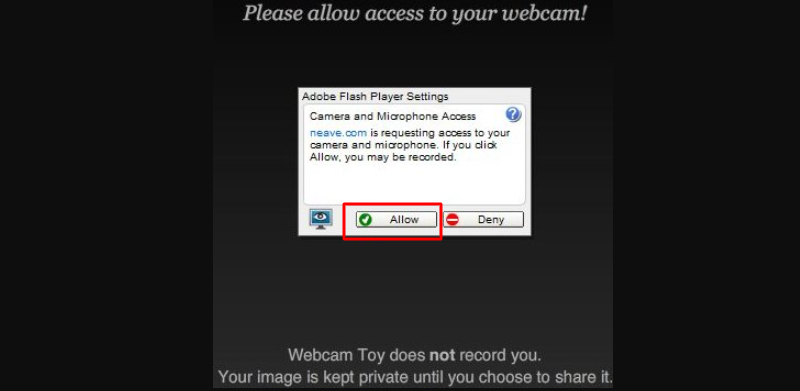
Step 3. Before you begin taking pictures, you will receive a notification to allow the webcam to take pictures online. Click on “Allow”.
Your webcam will start immediately.
Step 4. Now, you can see yourself on the screen. From the Pink button in the center of the screen, browse and Apply effects.
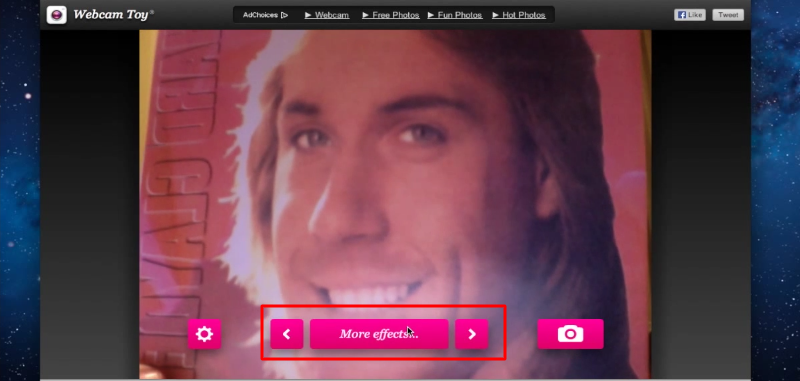
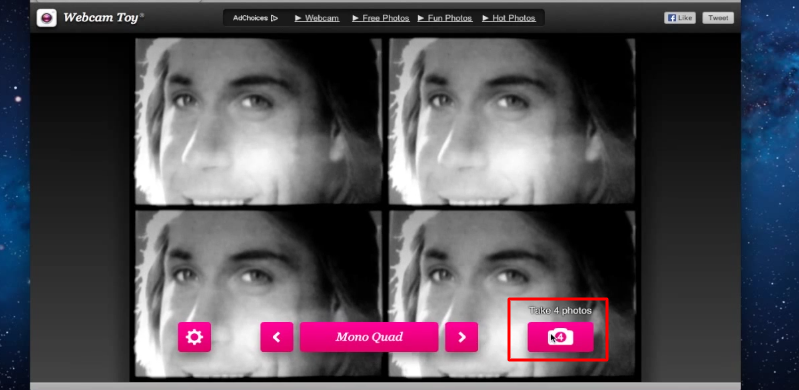
Step 5. To take a picture, click on the camera icon on the right side.
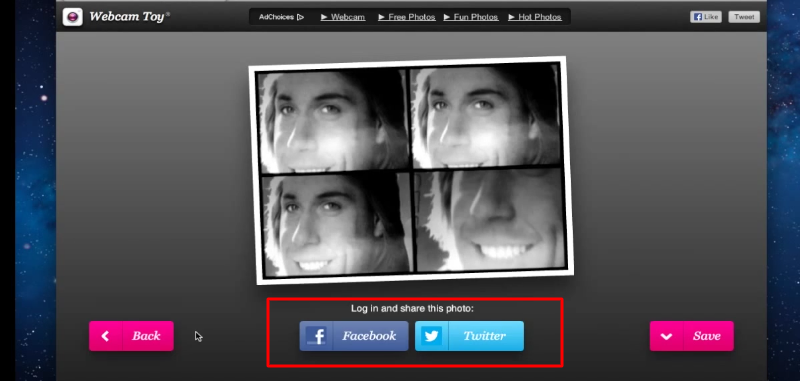
Step 6. Once you take the photo, you can see the save and share option. The picture can be saved on your system, or you can directly share it on Facebook and Twitter.
Part 3. How to Add Camera Effects Using Mac Built-in App
To add camera effects using the Mac Built-in app, you can use Photo Booth. It allows you to take pictures and record videos easily on your system yourself. The picture taken from the Photo Booth app can easily be sent by text message, email, or AirDrop. To use the MacBook camera filter using the built-in app Photo Booth, the steps are listed below:
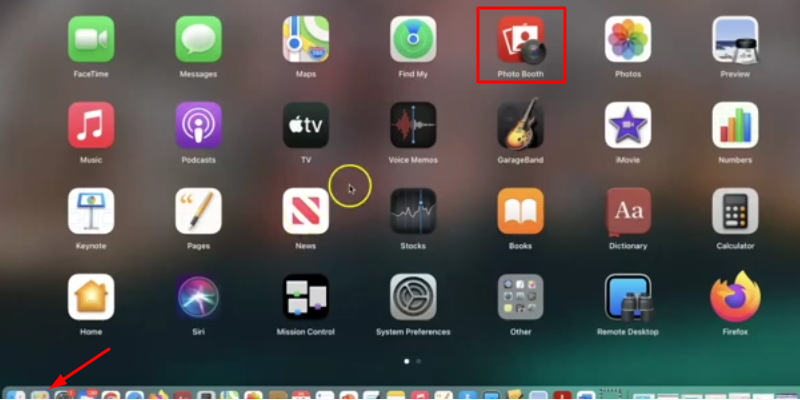
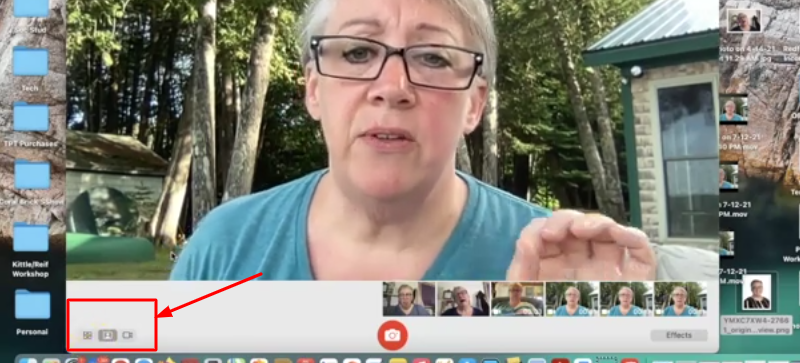
Step 1. Go to the launchpad at the bottom of your screen. Open the Photo Booth App.
Step 2. Now, in the bottom left corner. You can see three modes:
- If you click on the tiny box, it will take 4 pictures, one after another
- The center icon is to click the photograph
- The last third icon is to record a video
Step 3. Click on the Red Camera Button in the center of the screen to take a picture. It will do a countdown before taking a picture.
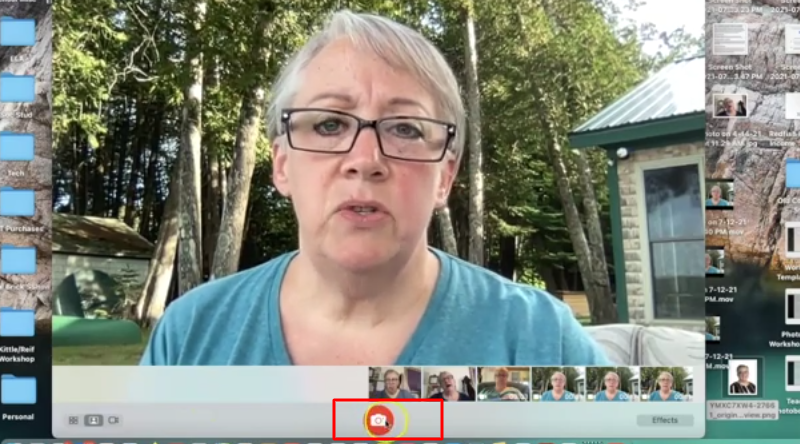
Step 4. To add effects, click on the “Effects” icon in the bottom right corner of the Photo Booth app.

Step 5. You can browse more effects by clicking on the forward arrow. Choose any effect to take unique and funny pictures.
Part 4. How to Add Face Camera Filters using Snap Camera
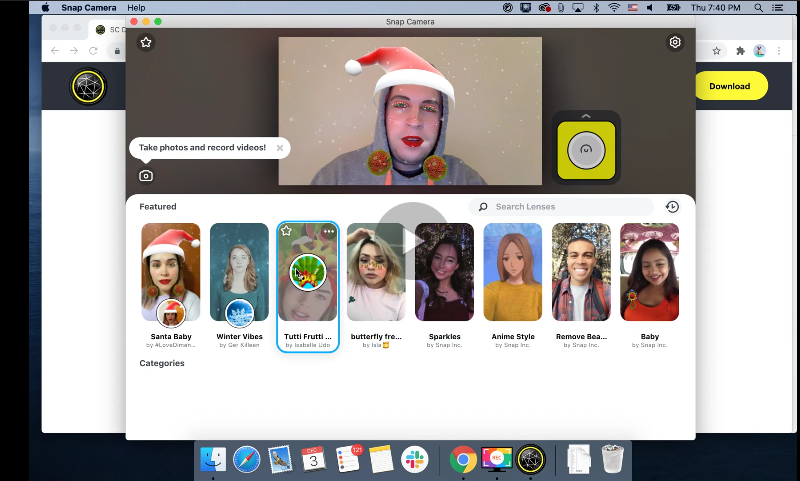
Snap Camera is a fun and creative app for the MacBook. It has Snapchat lenses that you can use during live streaming and video calls. You can use Snap Camera on MacBook by following the steps listed below:
Step 1. Open Snap Camera on your web browser or click here.
Step 2. Download and install Snap Camera on your MacBook.
Step 3. Once the app is started, you can see some Snapchat lenses on your screen. Browse the lenses.
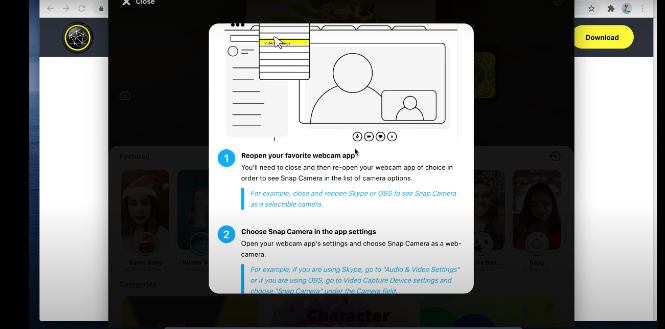
Step 4. To go live with the same snap camera lens. Click on “Show me How” right under your image.
Step 5. From Snap Camera, choose the app setting and go live.
You can also take pictures and record videos with the same filter on your face.
Part 5. How to Add Webcam Filters using Zoom
If you are using Zoom, you will know that Zoom has built-in filters and effects that you can add to your videos and on a live call. Furthermore, it also has some image and video virtual backgrounds you can use to hide your messy environment.
The steps to add webcam effects using Zoom are listed below:
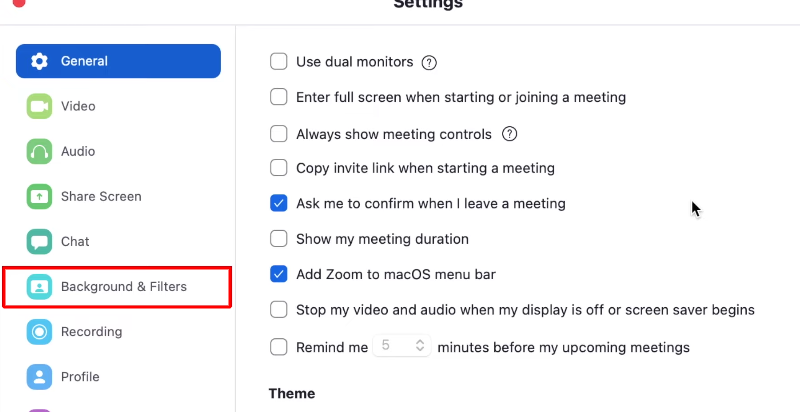
Step 1. To begin, open Zoom and click on the “Setting” icon in the top right corner.
Step 2. On the left side of the panel, select the “Background and Filter” option.
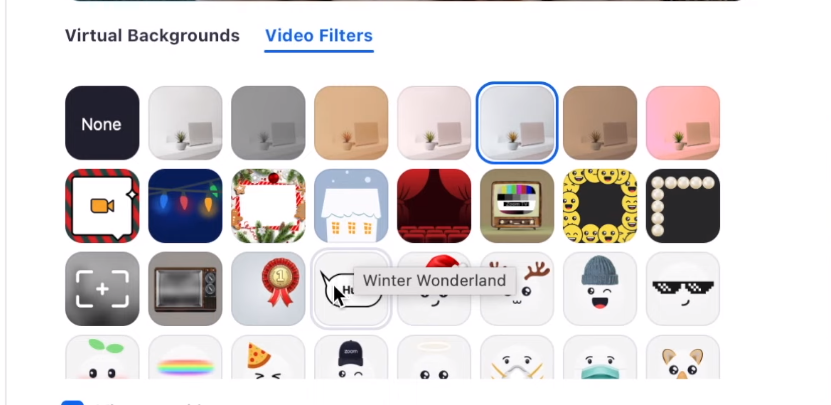
Step 3. Click on the Video Filter option. Browse and Select from the number of filters available on Zoom. You can add face effects too.
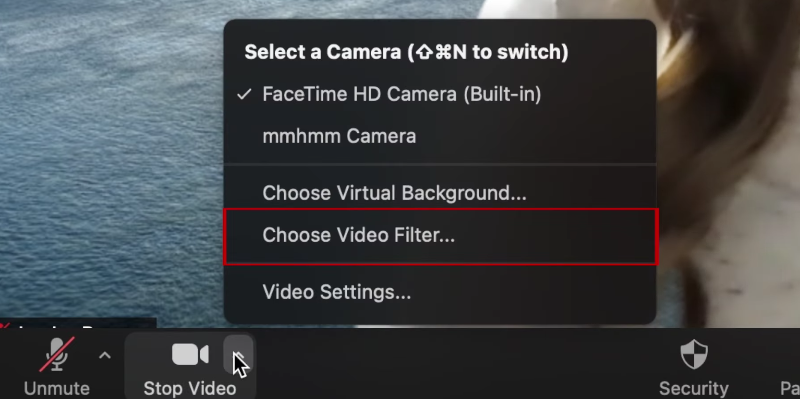
Step 4. You can easily change and remove the filter by clicking on the arrow right next to the Stop Video option. Click on Choose Video Filter.
Conclusion
To conclude, we have listed the 5 ways to add camera filters to your MacBook. The MacBook camera filters allow you to add creative and fun effects to your live videos just with your webcam. In addition, you can also use Webcam Toy to add a MacBook camera filter online. So, choose the method that suits you the best.