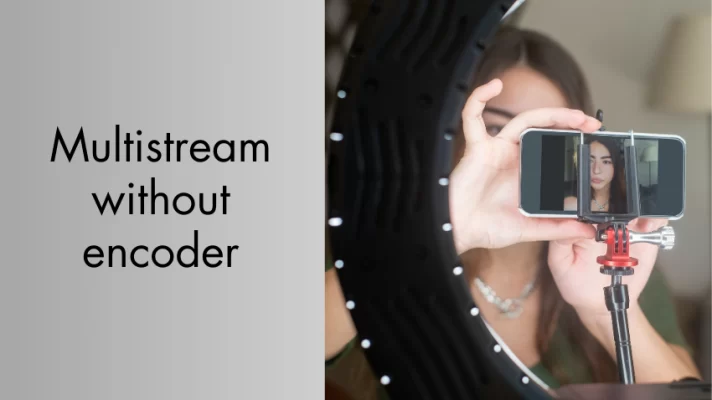
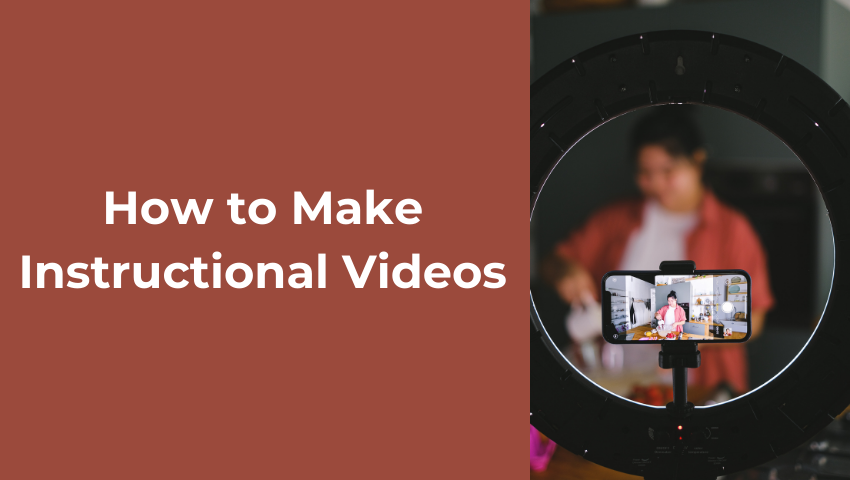
If you’re looking for a way to share your knowledge, skills, or passion with the world, instructional videos are a great option. Instructional videos are videos that show you how to do something, such as how to use software, how to cook a dish, or how to play an instrument.
Instructional videos can help you:
- Teach new skills or knowledge to your audience
- Provide step-by-step instructions or guidance for your audience
- Show the features or benefits of your product or service to your audience
- Answer common questions or troubleshoot problems for your audience
- Motivate or inspire action from your audience
But how to create an instructional video that is engaging, informative, and easy to follow?
In this guide, we’ll show you how to make instructional videos for beginners in 5 simple steps.
We’ll also give you some tips and best practices along the way, as well as some examples of amazing instructional videos for inspiration.
Let’s dive in!
Some of the Best Instructional Video Ideas
If you are looking for some inspiration or ideas for making instructional videos, here are some of the best instructional video ideas that you can try:
#1. How-to videos: these are videos that show how to do something step-by-step, such as how to bake a cake, how to fix a leaky faucet, or how to tie a tie
#2. Tutorial videos: these are videos that teach how to use a tool, software, or product, such as how to edit a photo in Photoshop, how to play guitar with Guitar Hero, or how to set up a smart home device
#3. Demonstration videos: these are videos that show the features or benefits of a product or service, such as how a vacuum cleaner works, how a fitness app tracks your progress, or how a car rental service operates
#4. Explainer videos: these are videos that explain a concept, process, or idea engagingly and simply, such as how blockchain works, how coffee is made, or how the solar system works
#5. FAQ videos: these are videos that answer frequently asked questions related to a topic, such as how to apply for a visa, how to use a coupon code, or how to contact customer support
#6. Testimonial videos: these are videos that feature real customers or users sharing their experiences or opinions about a product or service, such as how a software helped them grow their business, how a course helped them learn a new skill, or how a product helped them solve a problem
#7. Case study videos: these are videos that showcase a successful project or outcome that was achieved with the help of a product or service, such as how a company increased its sales with a marketing strategy, how a student improved their grades with a tutoring service, or how a nonprofit raised funds with a crowdfunding campaign
How to Make Quick Instructional Videos [Step-by-Step Guide]
Step 1: Identifying Your Audience and Video Topic
The first step of making instructional videos is to identify your audience and video topic. This will help you tailor your video content to suit their needs, interests, and expectations.
To identify your audience, you need to ask yourself:
- Who are they? What are their demographics, backgrounds, and characteristics?
- What are their goals, challenges, and pain points?
- What are their current knowledge level and skills?
- How do they prefer to learn and consume information?
- Where do they hang out online? What platforms do they use?
To identify your video topic, you need to consider:
- What is the main purpose or objective of your video?
- What is the main problem or question that your video will solve or answer?
- What is the scope and depth of your video? How much detail will you cover?
- What is the unique value proposition or angle of your video? How will you stand out from the competition?
Once you have identified your audience and video topic, you can move on to the next step: pre-production planning.
Step 2: Plan Your Video Before Filming
Pre-production planning is the process of preparing everything you need before you start filming your video. This will help you save time, money, and resources during the filming and editing stages.
#1. Writing a script
A script is a written document that outlines the content and structure of your video. It includes:
- The introduction: where you introduce yourself, your topic, and your main points
- The body: where you explain or demonstrate each point in detail
- The conclusion: where you summarize your main points, provide a call-to-action and thank your viewers
A script helps you:
- Organize your thoughts and ideas
- Ensure that your video flows smoothly and logically
- Avoid rambling or forgetting important information
- Deliver your message clearly and concisely
To write a script, you can use tools like Google Docs, Microsoft Word, or Celtx. You can also use templates or examples from online sources to guide you.
#2. Creating a storyboard
A storyboard is a visual representation of your video. It shows:
- The scenes or shots that make up your video
- The transitions or movements between each scene or shot
- The camera angles, positions, and movements
- The audio elements, such as voice-over, music, or sound effects
A storyboard helps you:
- Visualize how your video will look like
- Plan the composition and framing of each scene or shot
- Identify the equipment and props that you need
- Communicate your vision to others involved in the production
To create a storyboard, you can use tools like Canva, Storyboarder, or Boords. You can also use templates or examples from online sources to guide you.
#3. Preparing equipment and setting up your shooting location
The equipment that you need for making instructional videos depends on the type of video that you are making. However, some of the basic equipment that you may need are:
- A camera: this can be a smartphone camera, a webcam, a DSLR, or a camcorder
- A microphone: this can be a built-in microphone, a headset microphone, a lapel microphone, or a shotgun microphone
- A tripod or a stand: this can help you stabilize your camera and adjust the height and angle.
- A lighting kit or a natural light source: this can help you improve the brightness and quality of your video
- A screen recorder or a screencast software: A video recorder FineShare FineCam can help you capture your computer screen if you are creating video tutorials of the software
To prepare your equipment, you need to:
- Check the battery life and storage space of your camera
- Test the sound quality and volume of your microphone
- Adjust the settings and resolution of your camera and screen recorder
- Position your camera and microphone at a suitable distance and angle from yourself
- Set up your lighting kit or find a well-lit location
To set up your shooting location, you need to:
- Choose a quiet and distraction-free place
- Remove any clutter or unwanted objects from the background
- Add some props or elements that are relevant to your topic or brand
- Ensure that there is enough space for you to move and gesture
Step 3: Film Your Video
Filming is the process of capturing the video footage that you need for your instructional video. This is where you put your script and storyboard into action.
#1. Setting up the camera and microphone
Before you start filming, you need to set up your camera and microphone according to your storyboard. You need to:
- Mount your camera on a tripod or a stand
- Connect your microphone to your camera or computer
- Adjust the focus, zoom, and exposure of your camera
- Check the framing and composition of your shot
- Test the audio levels and quality of your microphone
#2. Filming techniques and best practices
While filming, you need to follow some techniques and best practices to ensure that your video is engaging, clear, and professional. You need to:
- Look at the camera lens or the teleprompter, not at the screen or yourself
- Speak clearly, confidently, and naturally, using an appropriate tone and pace
- Use gestures, expressions, and eye contact to convey emotion and interest
- Pause between sentences and paragraphs to create breaks and transitions
- Repeat or rephrase any mistakes or unclear points
- Use visual aids, such as props, diagrams, charts, or screenshots, to illustrate your points
- Use multiple shots, angles, and perspectives to add variety and interest
Some common mistakes and pitfalls to avoid are:
- Recording too much or too little footage
- Recording in low-resolution or poor quality
- Recording in a noisy or distracting environment
- Recording without a script or a storyboard
- Recording without rehearsing or practicing
FineShare FineCam is an AI virtual camera and video recording software that can help you film high-quality instructional videos with ease.
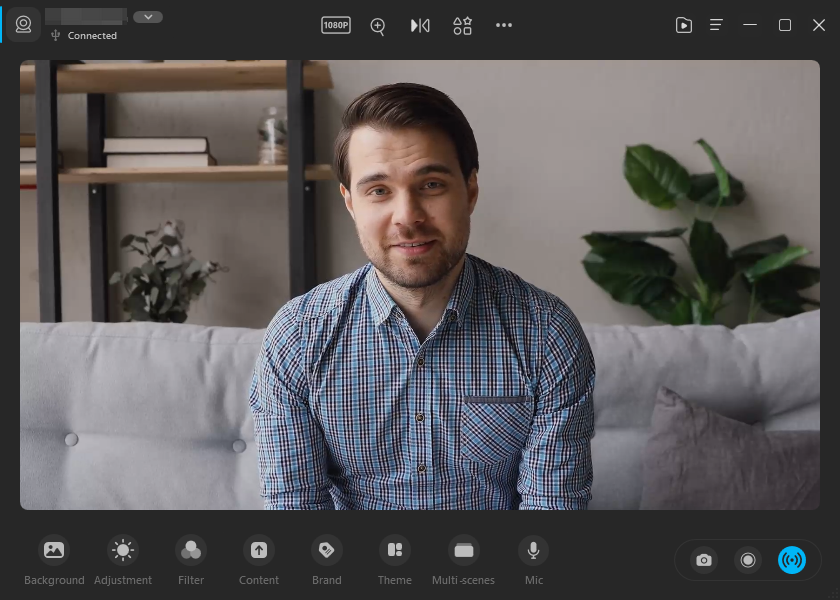
It has many features that can enhance your video, such as:
#1. Use phone as webcam:
You can turn your smartphone into a portable HD webcam with wireless connectivity and multiple angles.
You can adjust camera settings for the best look with video preview, control over zoom, orientation, resolution, front or rear camera, add camera shapes, and adjust overlay, brightness, and contrast with ease.
#2. Real-time AI background removal:
You can use AI to automatically remove the background. You can apply unique and creative backgrounds to enhance your video.
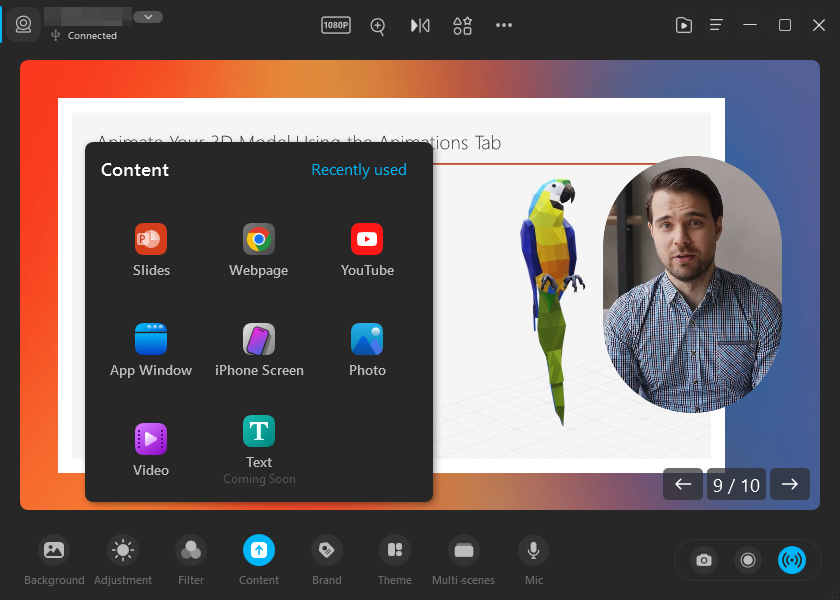
You can also use web pages, PowerPoint slides, or YouTube videos as backgrounds.
#3. Video switcher:
You can capture video from different angles and seamlessly switch between multiple scenes.
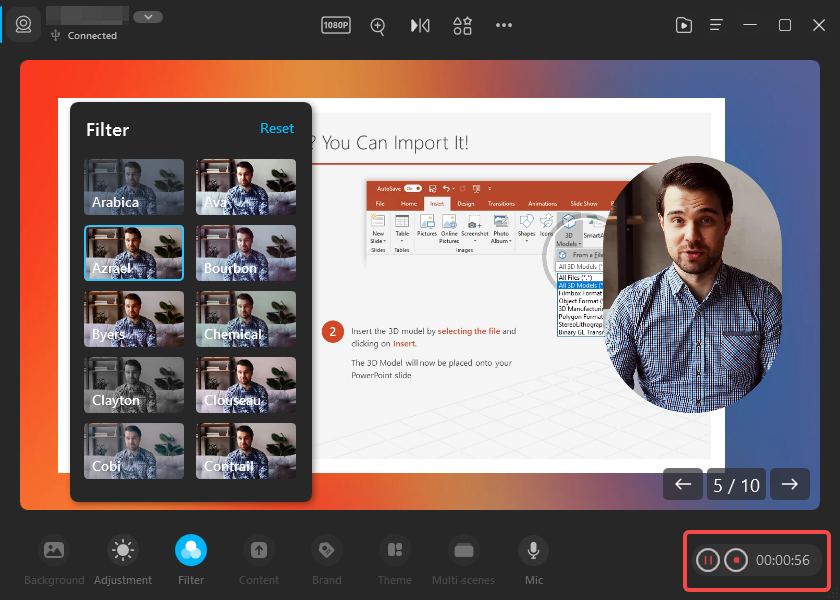
#4. Video enhancement:
You can provide a range of filters and adjustments that can adjust video brightness, and enhance the vividness of colors in your video.
You can also use smart portrait mode to bring a bokeh effect to your video, separate you from the background and make you stand out.
#5. Audio enhancer:
You can enhance your audio quality with cutting-edge audio enhancer features.
You can also use FineShare FineVoice to change your voice in real time with various effects.
To film your video with FineShare FineCam, you need to follow some steps such as:
Step 1: Download and install FineCam on your computer.
Step 2: Launch FineCam and choose a camera. You can connect the integrated webcam, or external webcam, or use Android or iPhone as webcam in FineCam.
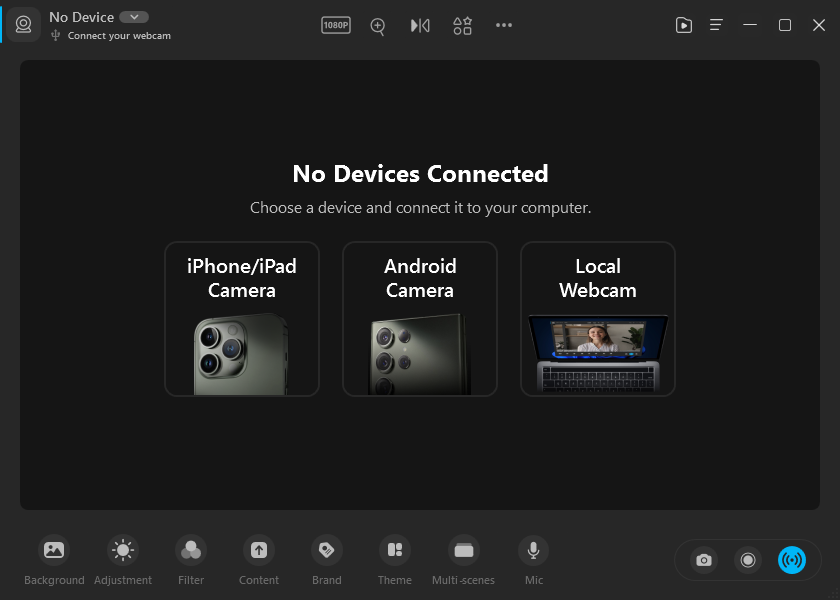
Step 3: Choose content to record and share. You can choose from an iPhone/iPad screen, slides, web page, YouTube, app window, videos/photos, or capture activities of an application window.
Step 4: Click Record to create instructional videos with the segment recording feature.
Step 4: Edit Your Video
After filming your video footage, you need to edit and polish it in post-production. This is where you will trim, cut, splice, and arrange your clips to create a coherent and compelling video.
#1. Editing software and tools
You need to use editing software and tools to edit your video. There are many options available, ranging from free and simple to paid and advanced. You should choose the one that suits your budget, skill level, and video needs.
- Some of the popular editing software and tools are:
- iMovie: A free and easy-to-use video editor for Mac and iOS devices
- Windows Movie Maker: A free and basic video editor for Windows devices
- Adobe Premiere Pro: A paid and professional video editor for Windows and Mac devices
- Final Cut Pro: A paid and advanced video editor for Mac devices
- Filmora: a paid and user-friendly editing software that offers various templates and effects
To edit your video, you need to:
- Import your video footage into your editing software or tool
- Trim, cut, split, or merge your video clips as needed
- Arrange your video clips in a logical sequence according to your script and storyboard
- Add transitions between your video clips to create smooth changes
#2. Video and audio editing techniques
You need to use various video and audio editing techniques to improve the quality and clarity of your video. You should also be aware of common errors and issues that can affect your video.
Some tips for video and audio editing techniques are:
- Adjust the brightness, contrast, color, and saturation of your video to improve the visibility and appeal
- Crop, zoom, pan, or rotate your video to improve the framing and composition
- Add filters, effects, or animations to your video to enhance the mood and style
- Adjust the volume, pitch, tone, and speed of your audio to improve the sound quality and clarity
- Remove any background noise, echo, or distortion from your audio
- Add music, sound effects, or voice-over to your audio to create interest and emotion
Some common errors and issues to avoid are:
- Having gaps or overlaps between your clips
- Having mismatched or inconsistent audio and video
- Having distorted or noisy audio
- Having low or high-volume levels
- Having spelling or grammar mistakes in your text
#3. Adding captions, annotations, and graphics
You need to add captions, annotations, and graphics to your video to make it more accessible, informative, and attractive. You should also be careful not to overdo it or distract from your main message.
Some tips for adding captions, annotations, and graphics are:
- Add captions to display the text of what you or others are saying in your video
- Add annotations to provide additional information or links related to your video
- Add graphics to illustrate or emphasize your points or data
Some things to consider when adding captions, annotations, and graphics are:
- Use clear and readable fonts, colors, and sizes
- Use appropriate and relevant images, icons, or charts
- Use consistent and coherent styles and formats
- Use minimal and concise text and labels
The final step of making instructional videos is to finalize and share your video with your audience. This is where you export, compress, upload, and promote your video.
#1. Exporting and compressing the video
To export your video, you need to save it in a format that is compatible with the platforms that you want to share it on. Some of the common video formats are:
- MP4: a widely supported and versatile format that offers high quality and small file size
- MOV: a high-quality format that is mainly used for Apple devices and applications
- AVI: a high-quality format that is mainly used for Windows devices and applications
- WMV: a low-quality format that is mainly used for web streaming and email attachments
To compress your video, you need to reduce its file size without compromising its quality. This will help you save storage space and bandwidth, as well as speed up the uploading and downloading process.
#2. Uploading and sharing on various platforms
To upload your video, you need to choose a platform that suits your purpose and audience. Some of the popular platforms for sharing instructional videos are:
- YouTube: a free and widely used platform that allows you to upload, watch, comment on, and share videos
- Vimeo: a paid and professional platform that allows you to upload, watch, comment on, and share videos with more control and customization
- Udemy: a paid and educational platform that allows you to create, sell, and enroll in online courses
- Wistia: a paid and business-oriented platform that allows you to host, manage, and analyze your videos
- Facebook: A free social platform for uploading and sharing short or live videos with your friends or followers
- Instagram: A free and visual platform for uploading and sharing short or vertical videos with your followers or stories
- TikTok: A free and viral platform for uploading and sharing short or vertical videos with music or effects
To share your video on these platforms or others like them, you need to:
- Create an account and a profile on the platform
- Choose a title, description, and tags for your video
- Choose a thumbnail, category, and privacy setting for your video
- Upload your video file to the platform
- Share your video link or embed code on your website, blog, social media, or email
#3. Promoting and marketing your video
To promote and market your video, you need to increase its visibility and reach your target audience. You need to:
- Optimize your video for search engines by using keywords, tags, and metadata
- Encourage your viewers to like, comment, share, and subscribe to your video
- Create a catchy and compelling title and thumbnail for your video
- Use social media platforms, such as Facebook, Twitter, Instagram, or LinkedIn, to share your video with your followers and groups
- Use email marketing platforms, such as Mailchimp or Constant Contact, to send your video to your subscribers and contacts
- Use paid advertising platforms, such as Google Ads or Facebook Ads, to run campaigns and target specific audiences for your video
Frequently Asked Questions
Here are some of the frequently asked questions related to making instructional videos:
#1. How long should an instructional video be?
There is no definitive answer to this question, as it depends on various factors, such as your topic, audience, purpose, and platform.
However, as a general rule of thumb, you should aim to keep your instructional video as short and concise as possible, without compromising on the quality and clarity of your content.
According to research by Wistia, the optimal video length for engagement is between 2 and 6 minutes.
#2. How do I make my instructional video more engaging?
There are many ways to make your instructional video more engaging, such as:
- Using storytelling techniques to hook your viewers and keep them interested
- Using humor, emotion, or surprise to create a connection with your viewers
- Using visuals, audio, and animation to enhance your message and appeal to different senses
- Using questions, quizzes, polls, or challenges to interact with your viewers and test their knowledge
- Using incentives, rewards, or gamification to motivate your viewers and encourage action
#3. How do I measure the effectiveness of my instructional video?
There are many metrics and indicators that you can use to measure the effectiveness of your instructional video, such as:
- Views: the number of times your video was watched
- Watch time: the amount of time your viewers spent watching your video
- Completion rate: the percentage of viewers who watched your video until the end
- Engagement rate: the percentage of viewers who liked, commented, shared, or subscribed to your video
- Conversion rate: the percentage of viewers who took the desired action after watching your video
- Feedback: the comments, reviews, ratings, or testimonials that you received from your viewers
Wrap It Up!
Making instructional videos is not as hard as it may seem. With the right planning, equipment, and techniques, you can create engaging and informative instructional videos that can help you achieve your goals.
In this post, we have told you how to make instructional videos in five easy steps if you are a newcomer.
Whether you want to know how to create video tutorials, how to make how-to videos, or how to make training videos, these steps can meet your needs.
We have also provided some tips and best practices along the way, as well as some examples of great instructional video ideas for inspiration.
Now it’s your turn to start making your own instructional videos.
Remember, practice makes perfect, so don’t be afraid to experiment and learn from your mistakes.
You can also ask for feedback from your peers, mentors, or experts to improve your skills and knowledge.
We hope you found this post helpful and informative. If you have any questions or comments, feel free to leave them below. And if you liked this post, don’t forget to share it with your friends and colleagues.
Happy video-making! ??