Do you always look for secluded places to record audio? Do you try to avoid the noise but your recording files are still filled with the unwanted sound of horns, fans, planes flying over, or dogs barking?
Even if you use an expensive soundproof microphone, you still find your breathing and coughing recorded when you edit your audio. You need clean and clear sound to convey your message, how do you get rid of these noises from your audio?
In this article, we will provide three of the most common methods to remove background noise from audio for you to choose from. Hopefully, this will save your otherwise unusable audio files.
And we have a voice changer to recommend to you in case you need to remove background noise while speaking. FineVoice is a real-time voice changer. It can change your voice when you are meeting, streaming, or gaming.
If you want to remove vocals from a song, check 10 Best Acapella Extractors of 2022.
How to Remove Background Noise from Audio in Audacity
The first software you should know that can be used to remove audio noise is Audacity.
Audacity is a free, open-source digital audio editor and recording software that was first released 22 years ago. It is available for all common operating systems.
Audacity has three tools to help remove background noise. The next section shows you the steps to use the Noise Reduction effect in detail.
Step 1. Download and install the official version of Audacity on your computer.
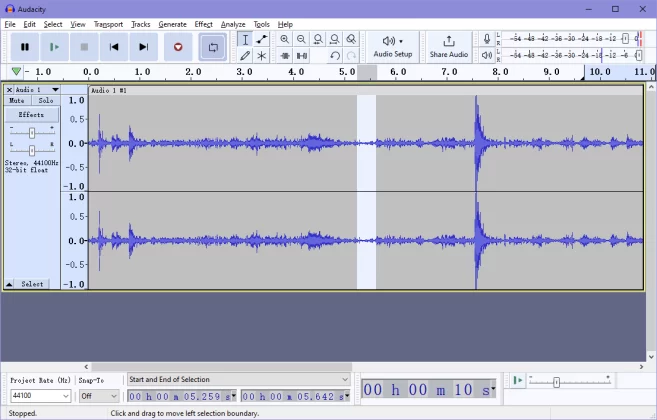
Step 2. Launch Audacity desktop client. Open, record, or import an audio file. Locate a background noise section of the audio file and select a few-second-long clip.
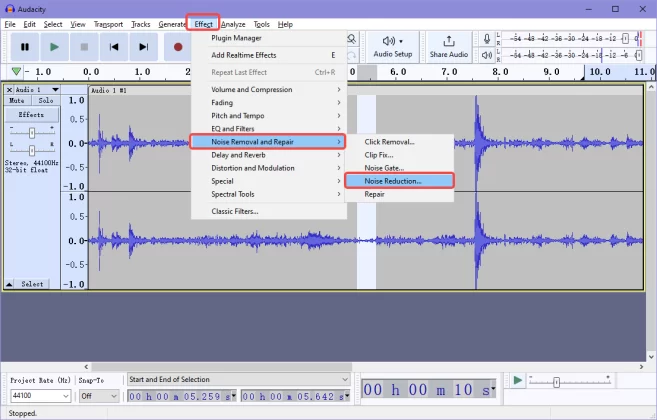
Step 3. Find Effect on the top menu bar, go to Noise Removal and Repair > Noise Reduction.
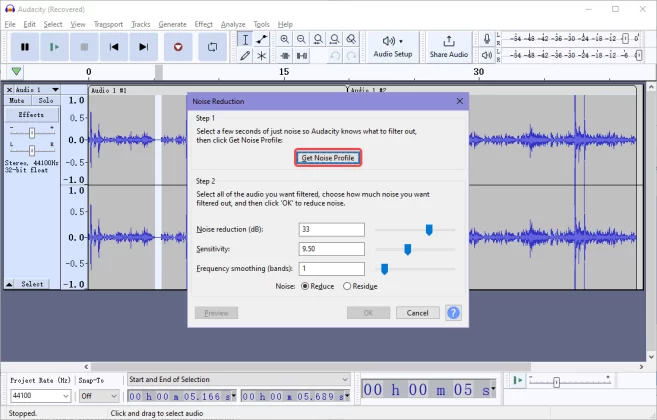
Step 4. In the Noise Reduction menu, press the Get noise profile button to let Audacity know what to filter out.
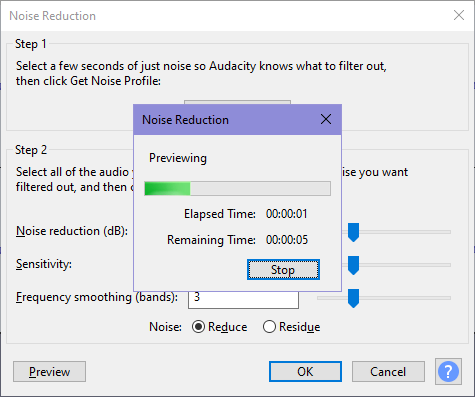
Step 5. Press CTRL+A to select all the audio. And go to Effects > Noise Reduction again.
Click Preview at the bottom left corner to hear if the noise reduction effect you want is achieved.
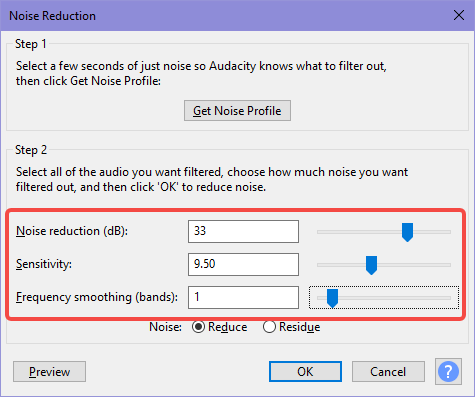
Step 6. If you think the effect is not good enough, please adjust the three sliders shown below. Click OK to apply the effect after adjusting.
Noise Reduction (dB): Controls how much volume to reduce for the identified noise.
Sensitivity: Controls how much of the audio is considered noise. Higher sensitivity means more noise will be removed.
Frequency Smoothing (bands): If artifacts are still present in the noise-reduced audio, the smoothing can make these artifacts sound more acceptable.
You can also select the Noise Gate effect to eliminate any sound quieter than a certain threshold or use the Notch Filter effect to eliminate hum or whistle at a specific frequency, as needed.
How to Remove Background Noise from Audio in Adobe Audition
Adobe Audition is a professional digital audio workstation developed by Adobe Inc. and has been released for nearly 20 years now.
There are also several effect tools available in Adobe Audition for noise removal. Now, let us focus on the use of the noise reduction effect.
Step 1. Download and open Adobe Audition. Audition is paid software, but you can have a free trial.

Step 2. Open your audio file in Audition, then click Effects > Noise Reduction / Restoration > Noise Reduction.
Step 3. Same as in Audacity, start by selecting a noise sample. And then click Capture Noise Print to let Audition know what kind of noise it should filter.
Step 4. Go back to the Noise Reduction menu. And adjust the Noise Reduction and the Reduce by slider to get the best result. Click Apply after finishing the adjustment.

How to Remove Background Noise from Audio in Krisp
If you want to eliminate ambient noise in your video conference, then you should try Krisp.
This is one of the best noise canceling software that uses an AI-driven noise filtering system to eliminate all types of noise in real-time with one click.
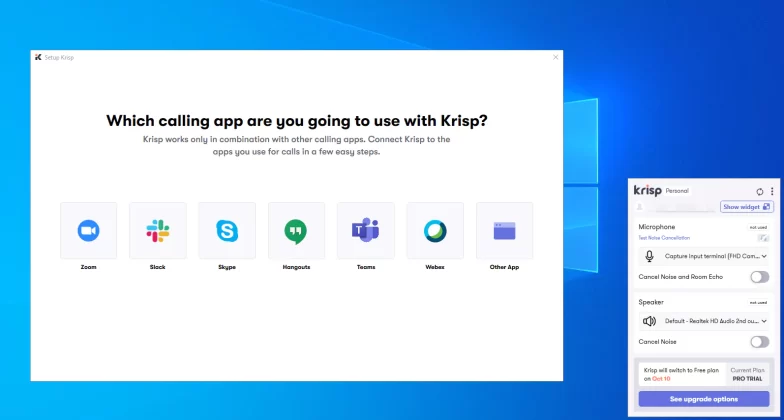
Step 1. Download Krisp on your computer.

Step 2. Open Krisp and sign up for your account. Choose the apps your want to use with Krisp.
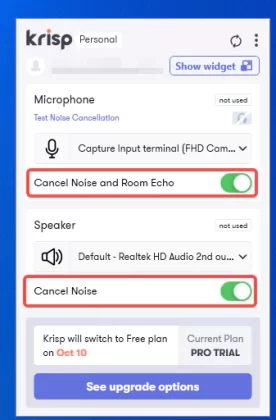
Step 3. Make the toggle switch on to allow Krisp to cancel noise.
Conclusion
Whether you want to eliminate noise in your audio files or you want to eliminate ambient noise in your video conference, you will be able to find a solution in this article.
Although using the above methods can save failed audio files, it is still recommended that you take steps to minimize environmental noise before recording for better recording results.