Have you ever listened to a podcast, a voiceover, a video tutorial, or any other type of audio content and noticed how the speaker’s breathing sounds are loud and distracting? Maybe you have even recorded your own voice and realized how much noise your breath makes.
Breathing sounds are natural and unavoidable when we speak, but they can ruin the quality and professionalism of your audio recordings. In this article, I will show you how to remove breathing from audio recordings with Audacity and how to prevent them from happening in the first place.
How to Prevent Breathing Noises from Being Recorded?
The best way to get rid of annoying breathing noises in your audio recordings is to not record them at all. Here are 5 methods you can use to avoid recording them and to keep your mic from picking up breathing noises in the first place.
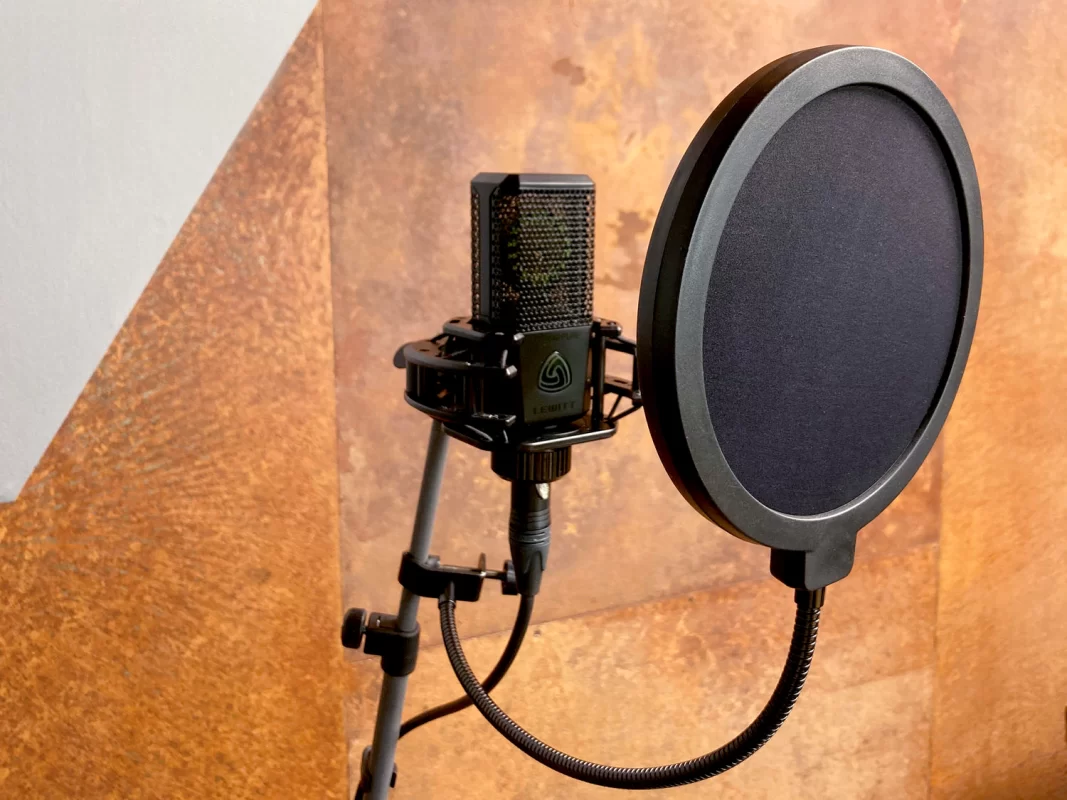
Method 1: Use a Pop Filter
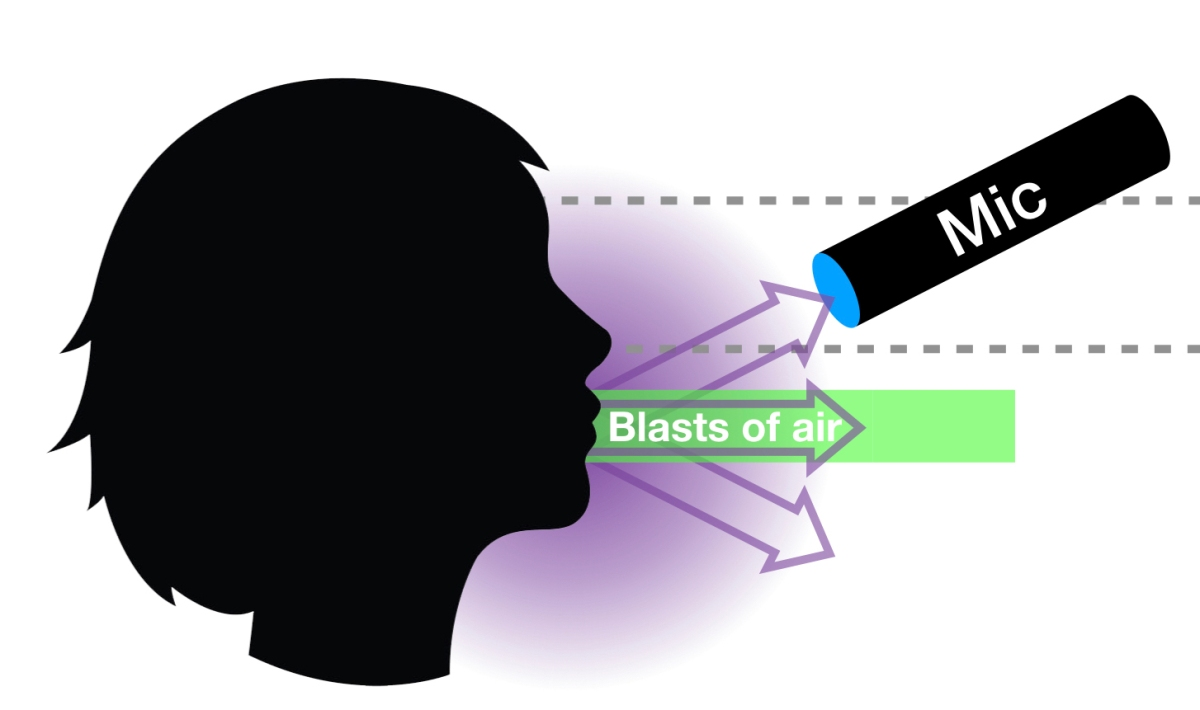
A pop filter is a simple device that you put in front of your microphone. It looks like a thin mesh screen that blocks the air that comes from your mouth when you speak. This can reduce the sound of pops (words that start with P or B) and breaths that hit the microphone directly.
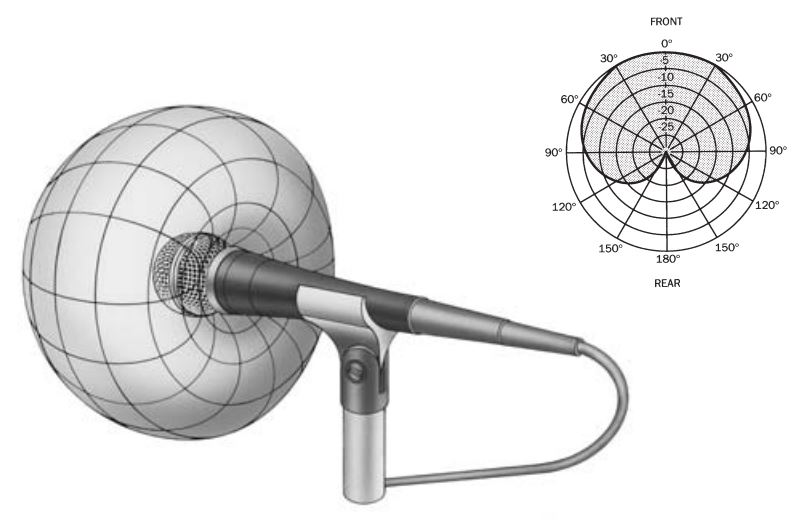
Method 2: Choose the Right Microphone
The kind of microphone you use can also affect how much breathing noise it picks up. A cardioid microphone is a type of microphone that picks up sound mainly from the front and rejects sound from the sides and the back. This can help you isolate your voice from the background noise and reduce the sound of your breaths that come from the sides of your mouth.
Method 3: Adjust your Microphone Position
The position of your microphone can affect how much breathing noise it picks up. You may want to experiment with different angles and distances to find the optimal spot for your voice and your breath. A general rule of thumb is to place the microphone about 6 inches away from your mouth and slightly off-axis, meaning slightly to the side or above or below it.
Method 4: Breathe Quietly and Evenly
The way you breathe can also influence how much breathing noise you produce. You may want to practice breathing quietly and evenly through your nose or the corners of your mouth, avoiding sudden or loud inhales or exhales.
Method 5: Drink Water and Avoid Dairy Products
Keeping yourself hydrated can help you avoid dry mouth, which can cause clicking or smacking sounds when you speak or sing. On the other hand, you may want to avoid dairy products, such as milk, cheese, or yogurt, as they can create mucus in your throat and mouth, which can make your breath sound more noisy.
Explore the Related Article: Vocal Remover from Video: A List of the Best Online and App Tools
How to Remove Breathing from Audio in Audacity?
Removing breathing sounds from audio recordings in Audacity is a common task for podcasters, musicians, and content creators. Audacity provides several tools and techniques to help you accomplish this.
Here’s a step-by-step guide on how to remove breathing from audio using Audacity.
Step 1: Launch Audacity and open your audio project, or import the audio file containing the breathing sounds by selecting File > Open.
Step 2: Zoom in on the audio waveform to identify the specific sections with noticeable breathing sounds. You can do this by clicking the magnifying glass icon in the toolbar or by using the Ctrl and + (or Cmd and + on Mac) keyboard shortcuts to zoom in.
Step 3: With the breathing sounds selected, go to the Effect menu and choose Noise Removal and Repair > Noise Reduction.
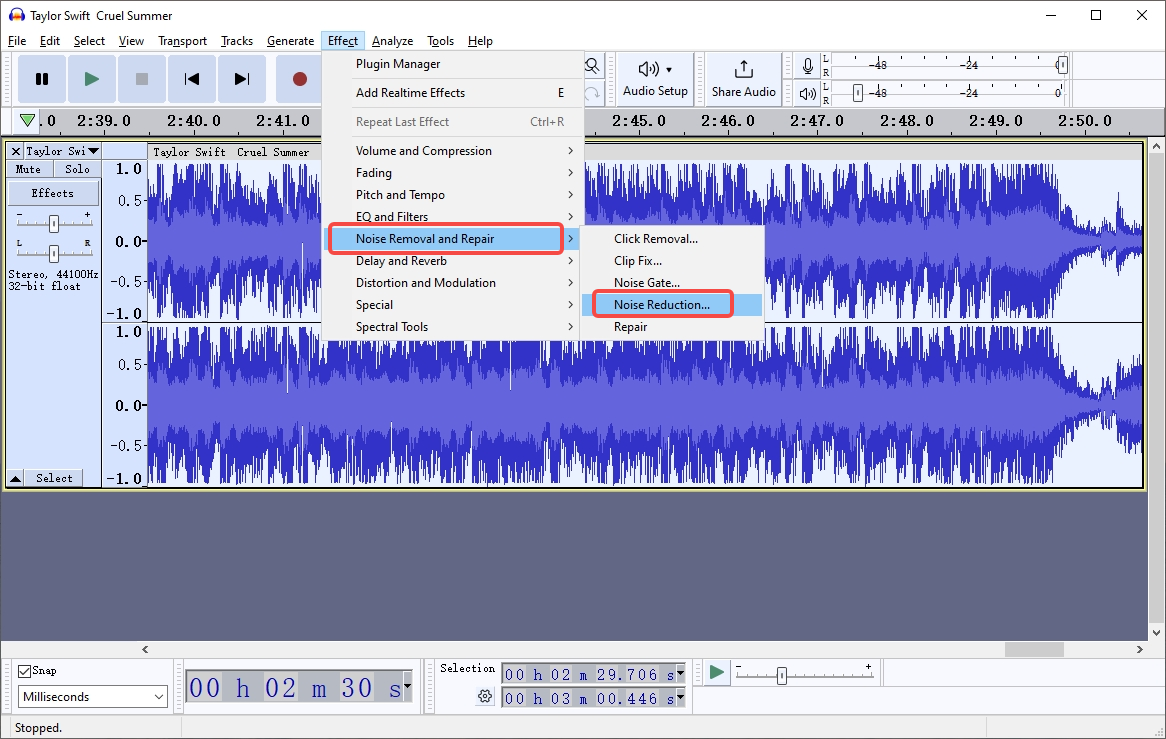
Step 4: Click the Get Noise Profile button. Audacity will analyze the selected breathing sounds to create a noise profile.
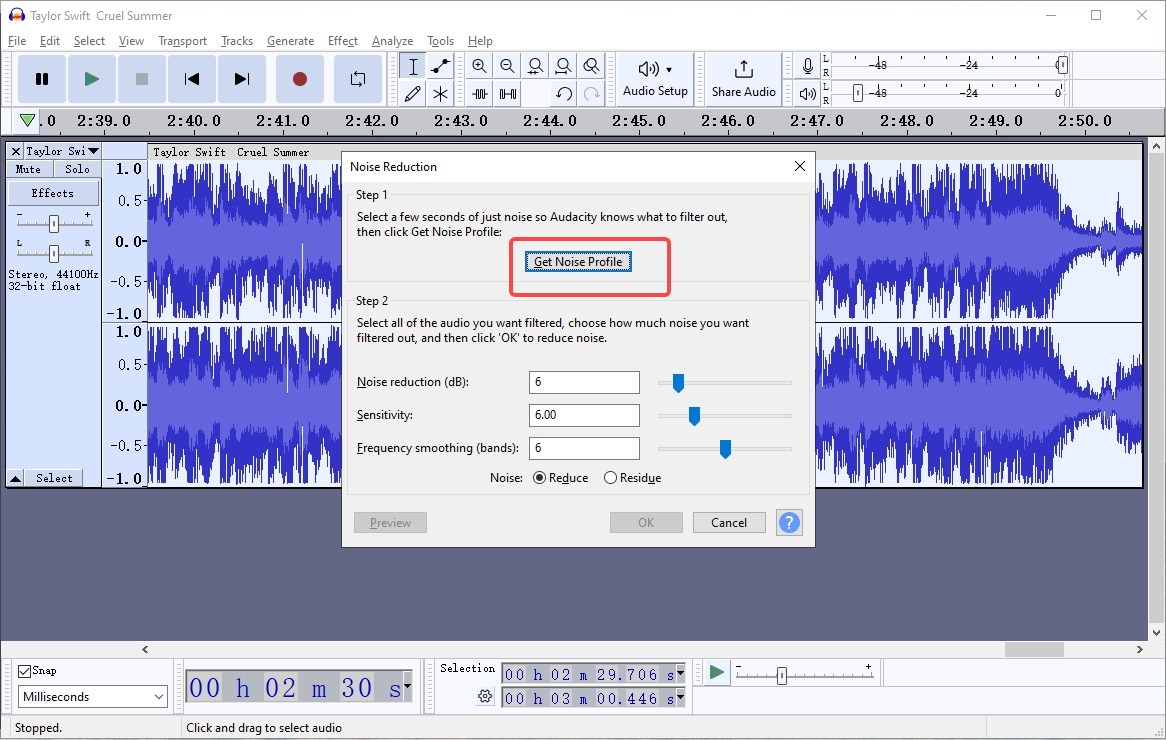
Step 5: After obtaining the noise profile, select the entire audio track by pressing Ctrl+A or Cmd+A on Mac.
Step 6: Return to the Effect menu and choose Noise Reduction once again.
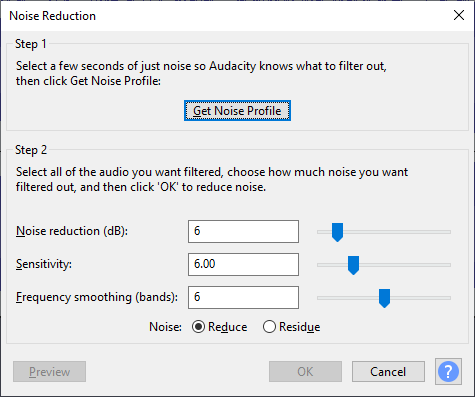
Step 7: Adjust the settings in the Noise Reduction dialog box.
- Noise Reduction (dB)
This setting controls how much noise reduction will be applied. A higher value means more reduction but may affect audio quality.
- Sensitivity
This determines how aggressively Audacity will apply noise reduction. Lower values are less aggressive, while higher values are more aggressive. Frequency Smoothing (bands)
This setting affects the spectral smoothing of the audio. A higher number of frequency bands may result in more precise noise reduction.
Step 8: Click OK to apply the noise reduction to the entire audio track. Audacity will process the audio, reducing the breathing sounds based on the noise profile you obtained earlier.
Step 9: Once you are satisfied with the results, save or export your edited audio by selecting File > Export and choosing your preferred file format and settings.
Bonus Tip: How to Create Your Own AI Cover Song with Singify?
Do you love music and want to create your own AI covers of songs with different voices? Then you should try Singify, the best free online AI song cover generator.
Singify uses advanced AI technology to generate realistic and expressive singing voices that match the original song. You can choose from a library of 100+ AI voice models, including famous singers like Adele and Taylor Swift, as well as popular rappers like Drake and Nicki Minaj. You can also try out different characters like SpongeBob, Homer Simpson, and Darth Vader, or even celebrities like Donald Trump, Elon Musk, and Morgan Freeman.

Here are the specific steps on how to make your own AI cover song.
Step 1: Visit the Singify official website and click on the Create AI Covers Now button.
Step 2: Pick your favorite AI voice from the huge collection of 100+ AI voice models. You can hear how they sound and choose the one that matches your mood and taste.
Step 3: Add the song you want to cover. You have 4 options: search by song title, paste the YouTube link, upload an audio file, and record your voice.

Step 4: Generate your AI cover and enjoy the magic. You can download, save, or share your AI cover with your friends.
That’s all! You have just made your own AI cover song with Singify. It’s easy, fun, and creative. You can explore your musical potential and discover new possibilities with Singify.
Related Article: How to Record a Cover Song Like a Pro in 6 Easy Steps?
Conclusion
Clear audio recordings, free of annoying breathing sounds, are the key to creating engaging and professional content. By improving your recording setup, refining your breathing technique, choosing quality microphones, and using audio editing software or specialized breath removal tools, you can achieve the goal of removing breathing from audio and enhancing your audio quality.
So, don’t hesitate to apply these techniques and tools to your audio projects and impress your audience with your sound skills. Your listeners will appreciate the sound clarity you deliver.

![How to Make a Karaoke Video with Scrolling Lyrics[Easy Guide]](https://www.fineshare.com/wp-content/uploads/2023/09/how-to-make-a-karaoke-video-feature-image.webp)