If you only need a clip of a song, a valuable part of an interview, or you want to get rid of the part of the dub that went wrong, how do you trim an audio file?
You need some audio editing tools to get rid of the unwanted parts and leave only the clips you want to use. In this article, I will introduce you to the 4 best ways to trim audio on Windows and Mac computers.
If you want to quickly cut or trim your audio file, I recommend you use an online audio trimmer like Fineshare’s Online Audio Cutter. It’s a free online tool with no limitations, ads, or hidden costs.
How to Trim Audio in Audacity
Audacity is an open-source audio recording and editing software that is available for free on Windows, macOS, Linux, and UNIX operating systems.
Audacity has an intuitive user interface, and you can learn how to record, produce and tweak audio in Audacity.
How to trim an audio file in Audacity? It is easy, you can refer to the following steps to try it out.
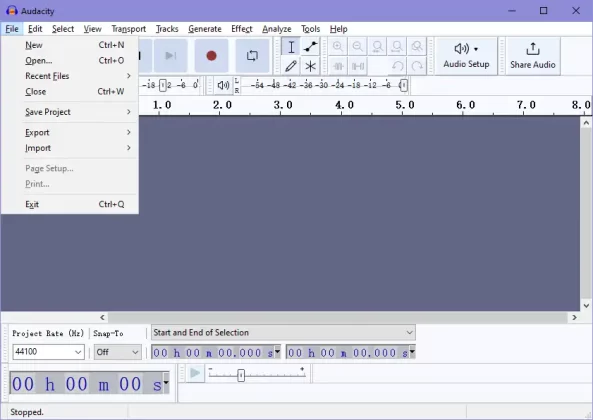
Step 1. Download and open Audacity.
Step 2. Open the audio file.
Click File on the top menu bar, select Open, Recent File, or Import to open the audio file you want to cut (or drag the audio file directly to the Audacity icon on the taskbar to open the file). MP3, WAV, and AIFF files are supported in Audacity. You can also create a new audio file or record an audio file directly in Audacity.
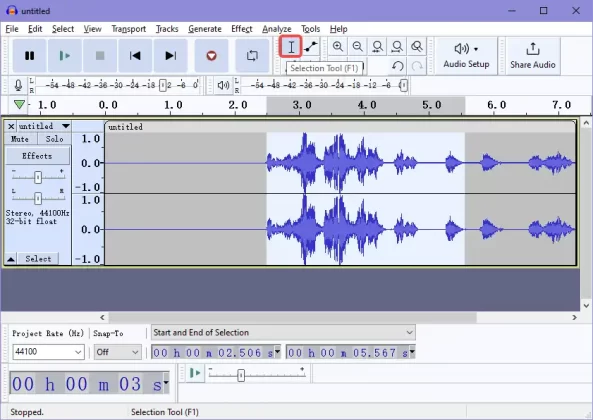
Step 3. Select the clip you want to keep.
You can zoom into the timeline and play the audio to make sure you will not trim off the audio you don’t want to change. Then click and drag the mouse to select the clip.
Step 4. Trim the audio.
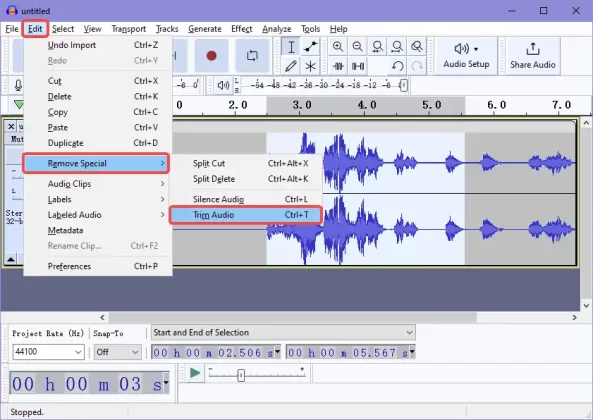
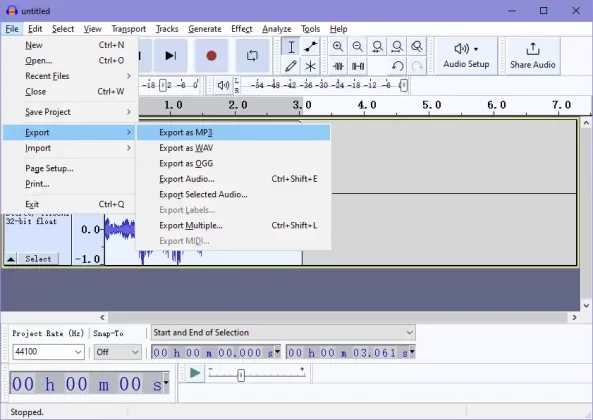
Find Edit in the menu bar, go to Remove Special, and click Trim Audio, or use the Ctrl + T shortcut to remove the audio before and after the clip you selected.
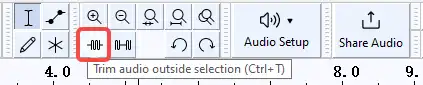
(You can also click the trim icon directly on the top toolbar as shown below)
Step 5. Continue editing or exporting the audio file.
How to Trim Audio in VLC Media Player
Maybe you have used VLC Media Player, a free open-source file player that supports all platforms. But did you know that audio trimming can be achieved with a simple button in VLC?
Let’s see how to do it together.
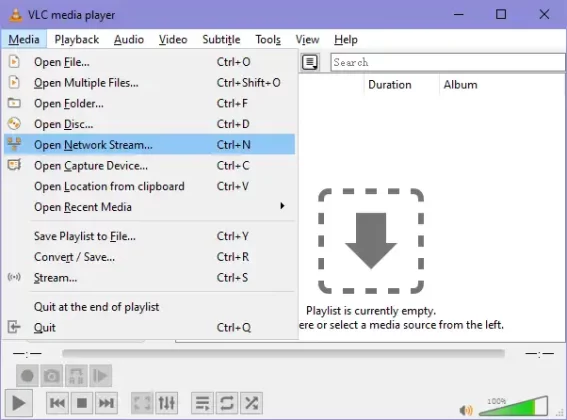
Step 1. Download and open VLC Media Player.

Step 2. Import an audio file.
Select a file source from the Media menu in the upper left corner, or directly drop a file into the playlist.
Step 3. Enable Advanced Controls.
Click on View in the menu bar and click Advanced Controls to enable advanced features.
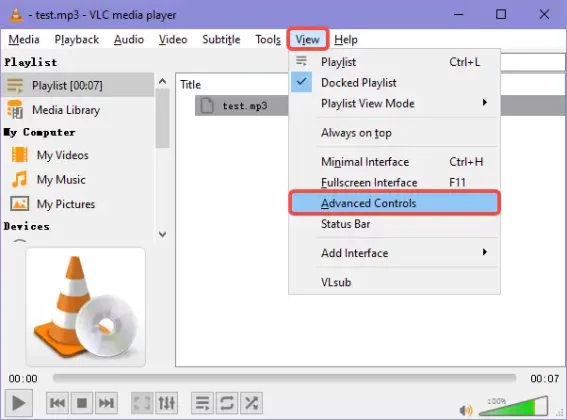
Then, you will see four more icons at the bottom.

Step 4. Trim the audio
That’s right, we are going to use the recording function to trim the audio.
Double-click on the audio file to start playback.
When the playback progress bar reaches the beginning of the audio you want to keep, click the red record button to start recording the audio.
After you get the clip you want, click the button again to stop recording.
(The recorded audio will be saved directly in the Music folder of This PC.)
This is the easiest way to trim audio, but you may find that you have to do it several times to get the exact result you want, and you can’t do more audio editing in VLC.
How to Trim Audio in QuickTime Player
If you are using a Mac computer, then the easiest way to trim audio is to use QuickTime Player, the media player pre-installed on your computer.
Let’s take a look at the steps to trim audio in QuickTime Player.
Step 1. Open the audio file.
Find your audio file in the Finder, right-click on it and select Open with> QuickTime Player.
Step 2. Set up the Trim tool.
Find Edit in the menu bar, and click Trim.
Step 3. Locate the trimming area.
You can see the yellow trim handles at both ends of the trimming bar.
Drag the yellow handles to select the audio clip you want to keep. The area outside the yellow handles is the area that will be trimmed off.
(Click and hold the handles to display the audio clip on a per-frame basis for more precise trimming)
Step 4. Click Trim.
How to Trim Audio in Windows Media Player
As same as on Mac, it is possible to trim audio files with the media player pre-installed on your Windows computer.
Just install a third-party plugin and you can trim your audio files with Windows Media Player once and for all. We are going to use SolveigMM WMP Trimmer plugin, it is a great audio trimmer. But remember the free version has a 10-minute output limit.
Here are the steps to trim an audio file with it.
Step 1. Download and install the free version of SolveigMM WMP.
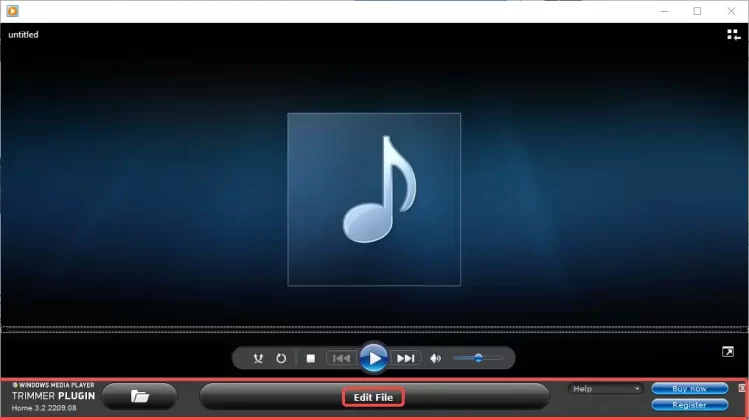
Step 2. Open the audio file.
Find the audio file on your computer and open it with Windows Media Player.
Step 3. Prepare the trim.
You can see the plugin appear at the bottom of the audio playback page. Click Edit File.
Step 4. Split the audio.
Play the audio, the orange playhead will show the current playback position.
When you reach the beginning of the clip you want to keep, click Add marker in the toolbar below.
A blue vertical line with a flag will appear on the corresponding position of the audio track to mark the position. The same applies to the end position.
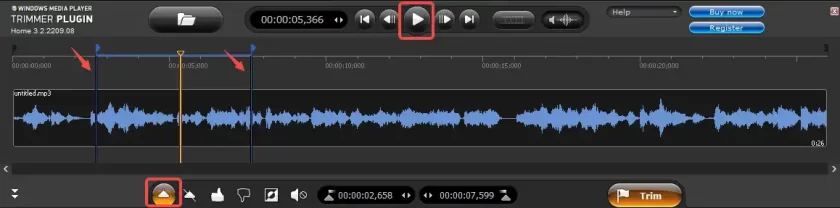
Now, click on the track again and you will see that the audio is divided into three parts by the marker.
Step 5. Cut out the unwanted area.
Click to select the area you don’t want, then click the thumb-down icon below to cut out the selected fragment.
The deleted parts will be darkened.

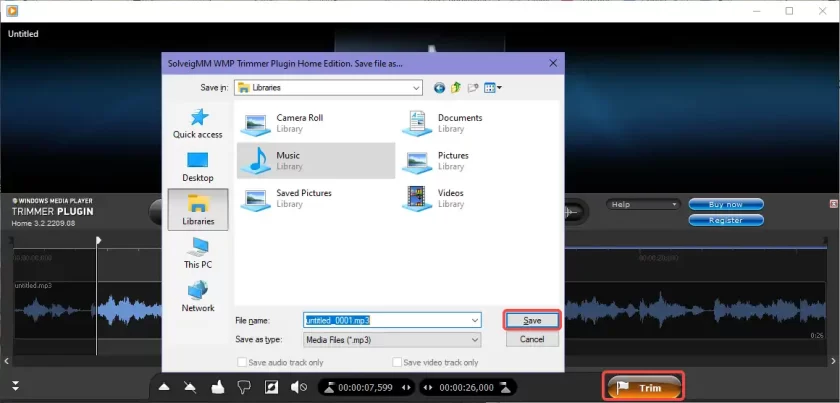
Step 6. Confirm and export.
Click Trim, a window will pop up, you can choose where to save the audio file and change the file name and file format.
Conclusion
This article shows you four easy ways to trim audio files. We hope that you will find a way you like, whether using a Windows or Mac computer.
In addition to these methods, there are many online audio trimmers available for you to use.