Setting up your Logitech webcam shouldn’t be quite the challenge. However, if you are stuck at it or don’t know how to go about it, don’t worry. By the end of this article, you will be in a position to set up your Logitech camera quickly.
Also Read: How to Set up a Phone as an HD Webcam
Want to know the best part? The article also covers different tips that you can use when the Logitech camera is not working properly. You no longer have to be frustrated by your webcam not working. Let’s fix that!
Part 1. How to Set Up Logitech Webcam on PC
A well-installed Logitech webcam shouldn’t trouble you setting up. However, you may find it challenging if you don’t know the correct way to set it up. Besides, if not well set up, likely, it won’t work or won’t detect your webcam.
If you don’t know how to use the Logitech webcam or set it up, follow the steps below:
Step 1. Connect the Logitech webcam to your PC
Depending on the model type of your Logitech webcam, you can place it on a tripod stand or clip it at the top of your monitor.
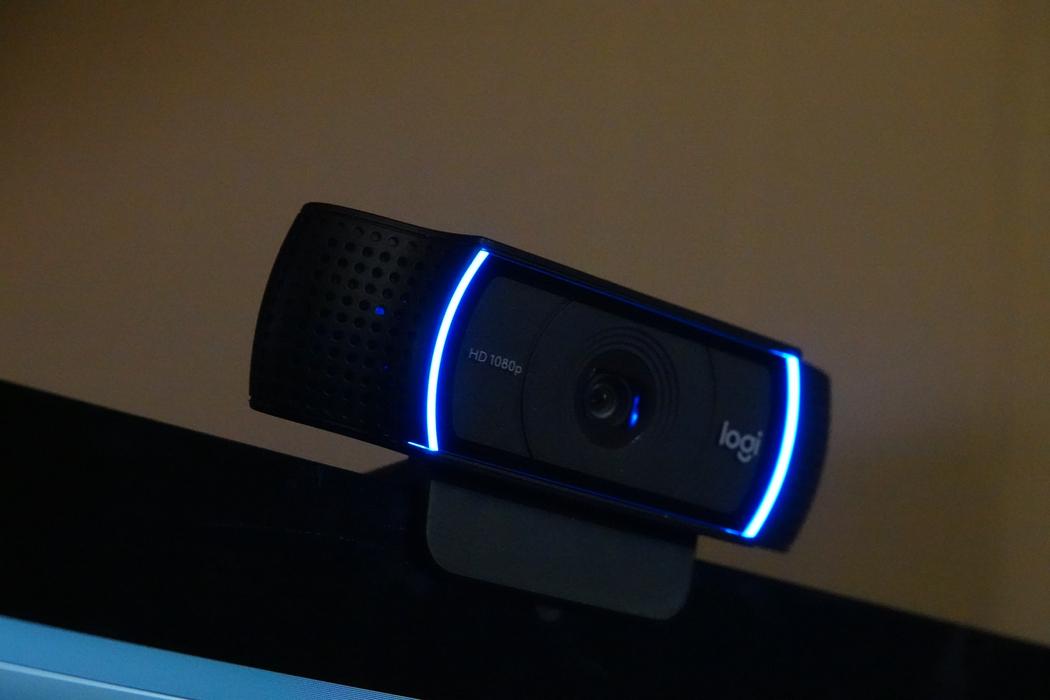
Once the Logitech is well placed, proceed to connect it to your PC using its USB cable to one of the USB ports of your PC. Ensure your USB port is working.
Step 2. Test your webcam using the Camera app
With the webcam connected, you need to ensure your camera app is working fine. There are lots of methods you can use to check or test your camera. And if you are using a Windows computer, you can use the built-in Camera app to check:
To check your camera:
- Click the Start button and search for your Camera or type Camera on the search bar.
- Click to open the Camera.
- Once the Camera opens, you should see yourself.
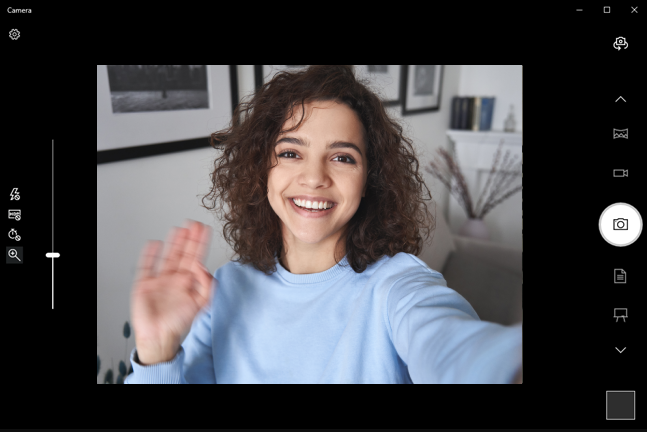
If you don’t see yourself, click the camera dial to flip the Camera. That should work, and now you should see yourself on the screen.
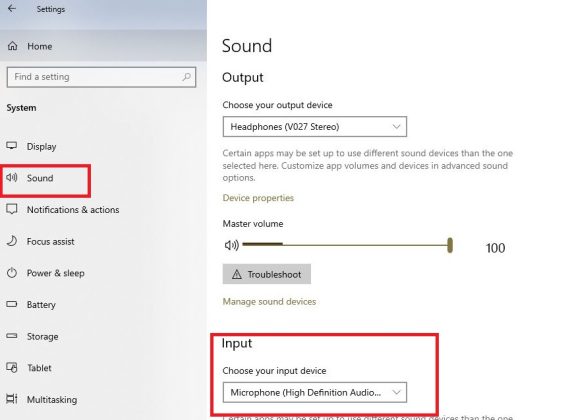
Step 3. Set Up the Audio Device
If your Logitech webcam comes with a camera microphone, you will go to test and set up the microphone.
To check and set up the microphone:
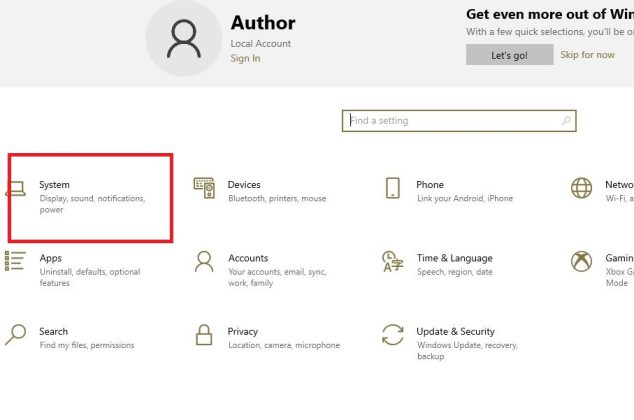
- Click the Start menu, type Settings on the search bar, and then hit the enter key.
- Navigate to System.
Your Logitech webcam is now successfully set up, and you can go ahead and test it. It should now work fine. If you encounter an issue, check the section below on fixing it.
Part 2. What to Do If Logitech Webcam is Not Working
Is your Logitech camera not working? Ideally, a well set up Logitech webcam should function properly. However, this is not the case at all times. Some issues arise, such as Logitech capture not detecting a webcam.
If you are encountering such webcam problems, don’t panic! You’re not alone. You will soon fix your webcam using one of the tips below.
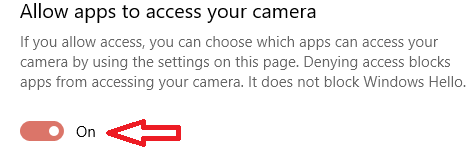
Tip 1. Check the Camera Privacy Settings
Windows has privacy settings that often block the installed apps, such as the Logitech webcam. If the app is blocked, it may not access the Camera, thus unable to detect your webcam.
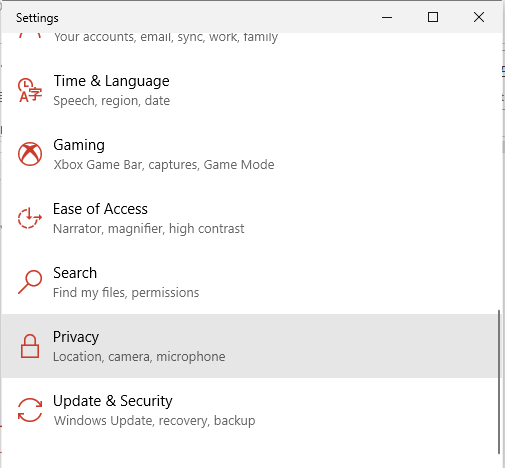
- Click the Start menu, enter Settings on the search bar, and click the enter key.
- On the next screen, click the Privacy option.
Tip 2. Reinstall the Logitech Webcam Software
In some instances, the Logitech camera not working results from the installed Logitech software. The solution is to uninstall the installed software and then install it again. Hopefully, the problem will fix.
- Click the Windows logo key and the R keyboard key simultaneously.
- A screen will appear. Type appwiz.cpl, then hit the enter key.

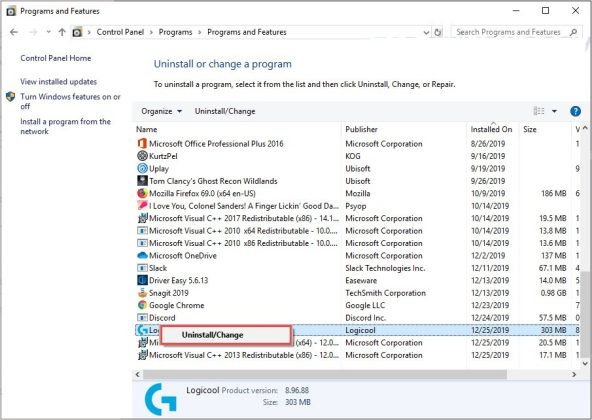
If that doesn’t work, try uninstalling the entire Logitech software, and installing it new from the Logitech website. Lastly, restart your PC after installation completes.
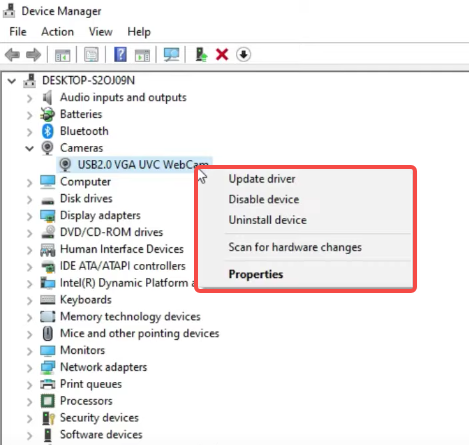
Tip 3. Update the Driver for Your Logitech Camera
If you have an outdated Logitech webcam or an in-built webcam driver, it can hinder the working of your Logitech camera.
To update the camera drivers:
- Click the Start button and type Device Manager, then click the enter key.
- Once the Device Manager opens, scroll down to Camera or Imaging Device.
- Right-click each of the drivers and choose to Update Driver.
Tip 4. Check the USB Connection
It’s not every time the Logitech webcam failure is software or driver-related. It could be the physical connection of the USB cable. So, check the USB cable to see if it’s working properly. Furthermore, try using another USB port and see if it works.
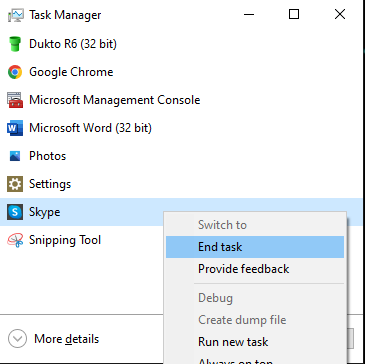
Tip 5. Check Conflicting Apps
The webcam could have stopped working after conflicting with other apps, such as VPN, Discord, or Skype. If you have a VPN from Malwarebytes on your PC, that could be the main conflicting app.
The solution requires you to disable the conflicting app through Task Manager temporarily.
- Click the Start button, type Task Manager, and then enter.
- Look for the conflicting app from the running tasks.
- Right-click the app and choose End Task.
Tip 6. Use Alternative Webcam
If none of the tips has fixed your Logitech camera not working, you can try other alternative ways. For one, you can try using your phone as an external webcam. You need an app that lets your iPhone mimic the webcam functionality and display the output to your PC.
You can also try using a digital camera. It will work fine, and you won’t have any more trouble with your webcam.
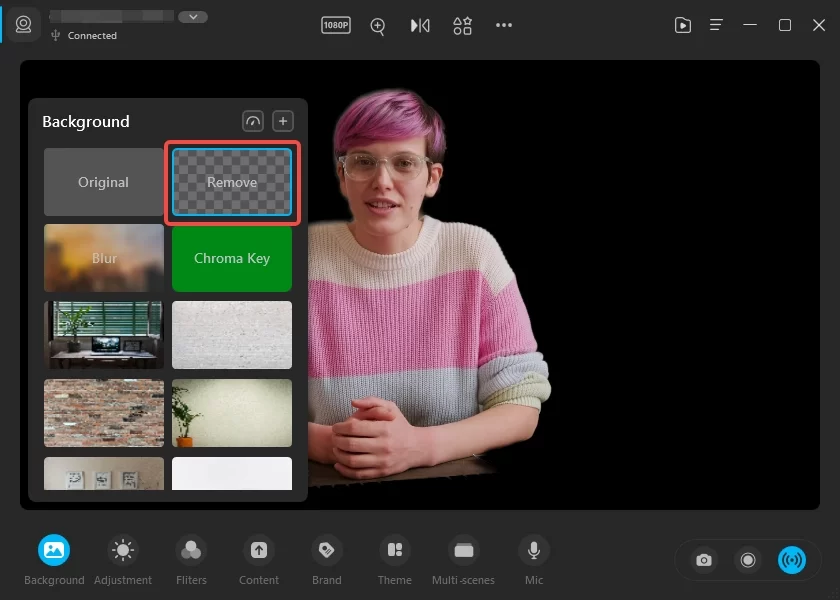
Bonus: How to Remove Background on Logitech Webcam
While you participating in online meetings, online lessons, or webinars, have you ever wanted to remove the webcam background? We will use Fineshare FineCam as an example and show you how to easily remove background Logitech step by step.
Step 1. Install and launch FineCam.
Step 2. Set up your camera, and click the Background option in FineCam.
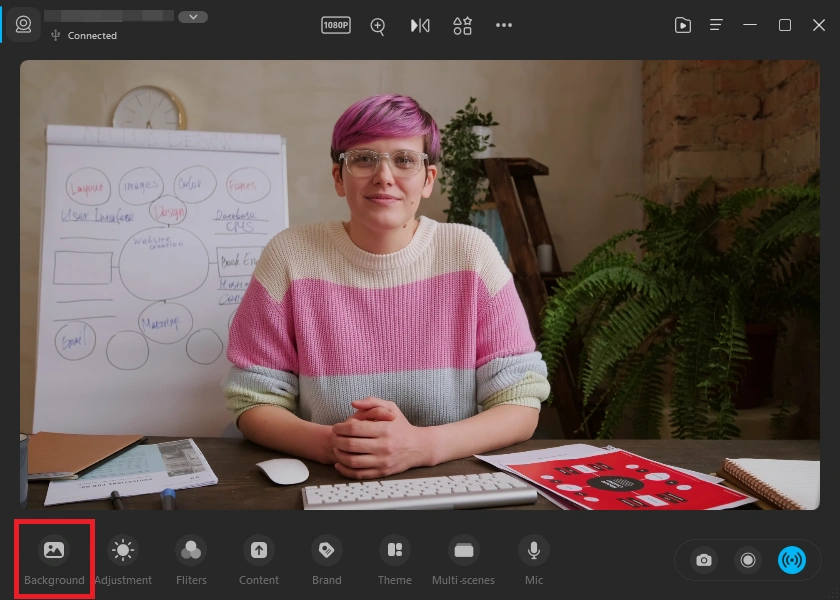
Step 3. Choose the Remove option to remove the webcam background.
You can also try other options to change your webcam background. And if you are interested in free webcam background removal software, you can find out more here: 5 Free Webcam Background Removal Software for Windows & Mac
Conclusion
You’ve now learned how to set up Logitech webcam on your Windows PC. If you encounter any problems, the tips listed above will hopefully fix the problem, and you will soon regain your Camera in the right state. All the best!