Webcam filters allow you to improve your video quality in various ways, including increasing contrast, adjusting brightness, creating more vivid colors, and more.
In this article, you will know five frequently used OBS filter tools you can use to create an amazing video for streaming, recording, and chatting, as well as the way to download 70+ webcam LUT filters.
OBS Studio is one professional webcam program mainly for steaming. For taking selfies or recording videos, there are lots of other free webcam filter apps you can use.
Part 1. Cinematic Camera Filters for OBS – LUTs
You can apply LUTs (Look Up Tables) to your image to enhance the quality or create an image with some kind of dramatic effect. Sometimes, you might have to buy a camera that has different features in order to create different effects on your image. Therefore, LUTs will save you money from buying a camera.
Where to Download 70+ LUTs for OBS?
There are several LUT files preinstalled on OBS Studio, so you may like to enrich your LUT library. Luckily, there are 70+ LUT filters you can add to your OBS filter folder. These filters are provided by an OBS user named Jordan.
Step 1. To use these OBS webcam LUT filters, you should download them from Google Drive.
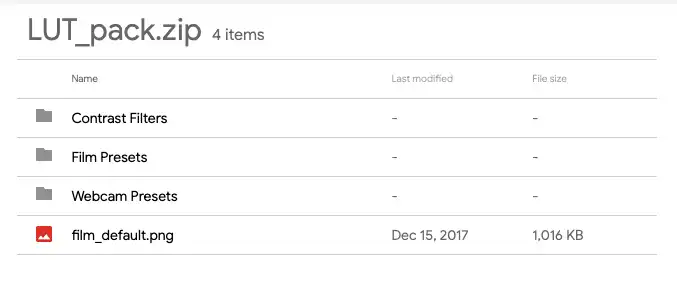
Step 2. Unzip all filters from the zip pack, and then drag and drop all of the 70+ LUTs to the OBS filter path. And my path is C:\Program Files\obs-studio\data\obs-plugins\obs-filters\LUTs.
How to Add LUTs Webcam Filters on OBS Studio
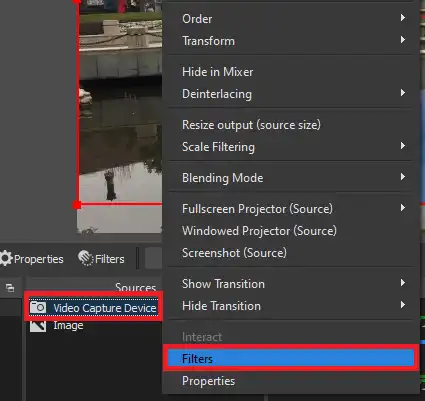
After you’ve added a webcam capture device as a source for your scene, you can follow the steps below to apply a LUT webcam filter to your video.
Step 1. Under Sources, go to your webcam > right-click on it > click on Filters
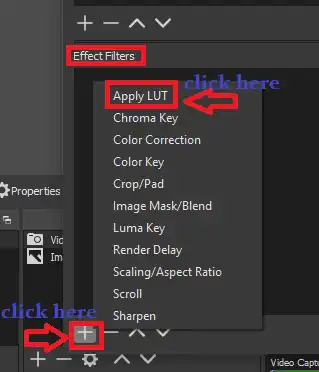
Step 2. Under effect filters> click on the “+” sign> click on Apply LUT.
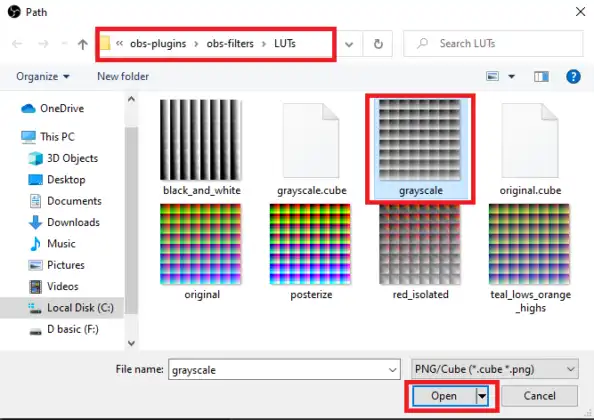
Step 3. Click on “browse” to indicate the file path of LUT files.
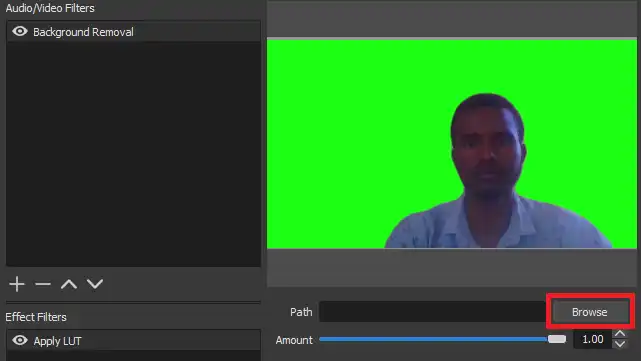
Step 4. Here, as you click browse, it will directly lead you to the LUTs file path or you can go to this directory (C:\Program Files\obs-studio\data\obs-plugins\obs-filters\LUTs) > select the LUT that you are interested > click open.

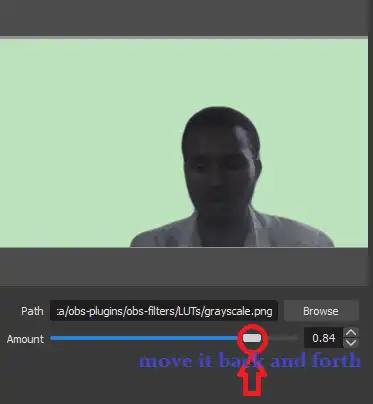
Now you will get the effect of the LUT that you already have chosen. Moreover, you can adjust the amount by moving the pin forward and backward, and you can see the effect by yourself.
Part 2. Remove Webcam Background – OBS Chroma Key
This filter is used to remove backgrounds. When you are applying this filter, you are telling the obs-studio what color to remove (maybe green screen or any other background you do have). In a nutshell, you will have the opportunity to select the color that you would like to discard from your camera.
To add this filter to the obs studio, follow the following simple steps.
Step 1. Under sources, go to your webcam > right-click on it > click on filters
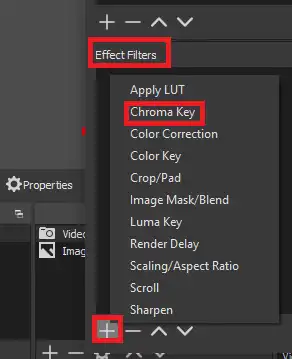
Step 2. Under effect filters> click on the “+” sign> click on Chroma Key.
Step 3. After clicking OK, you will get the following window with multiple options you can set up.
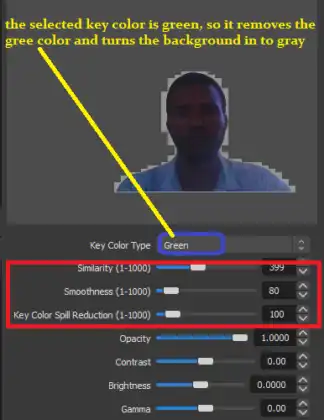
The Chroma Key has eight settings. Out of them Similarity, Smoothness, and Key Color Spill Reduction are the major settings, and you can vary them to see a better result for your image. You can leave the default value of the last four settings as it is.
The low similarity will bring unwanted background, and high similarity causes image loss. So put it in between 100 and 300. And low smoothness is better, high smoothness will turn your image into white and create random spots around the edges.
Part 3. Adjust Color & Brightness – OBS Color Correction
It is one of the main filters which allows you to change colors, including gamma, contrast, brightness, saturation, opacity, and so on. To add this OBS webcam filter, please follow the following steps.
Step 1. Under sources, go to your webcam > right-click on it > click on Filters.
Step 2. Under effect filters > click on the “+” sign> click on Color Correction > click “ok”.
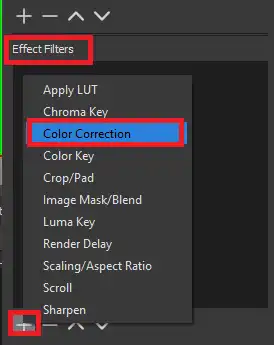
Step 3. You will get the following window with the settings of the color correction filter.
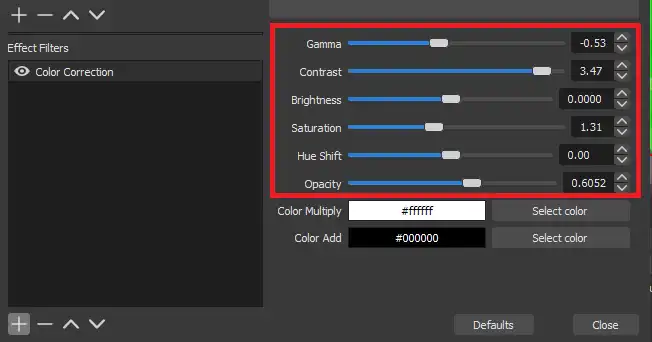
Among the eight settings, suggested worrying about six of them.
- Gamma: this setting alters the grayscale between full black and full white.
- Contrast: affects the gain of gamma, the gain has a direct relationship with the magnitude of the scale that oscillates from black to white and vice versa.
- Brightness: affects the image brightness, the entire image of your webcam.
- Saturation: controls vibrancy (intensity) of each color.
- Hue shift: it is a remedial solution for any kind of weird color cast.
- Opacity: adjusts the transparency of the filter’s effect on the image (the transparency of the above-listed filters).
Part 4. OBS Webcam Filters – Crop/Pad
This filter determines the amount of your webcam that has to be displayed, it has four setting variables i.e. left, top, right, and bottom. Sometimes, you may have unwanted things beside you while you are recoding.
In this scenario, you may want to discard the thing from the display, and hence you can crop it out using the setting of this filter in your obs-studio. To add this filter to your webcam, do the following steps which are supported by figure depictions
Step 1. Under sources, go to your webcam>right click on it>click on filters
Step 2. Under effect filters> click on the “+” sign> click on Crop/Pad>click on “ok”.
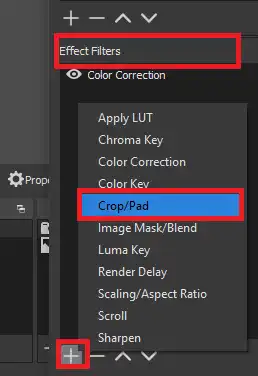
Step 3. After clicking OK, you will get the following window, and it lets you adjust the crop settings on your image.
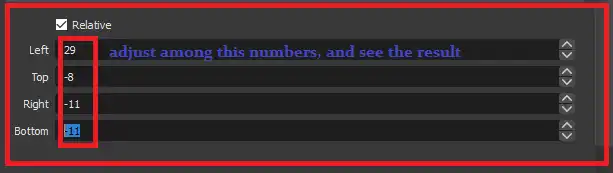
How Do The Setting Numbers Affect The Behavior of The Image?
The positive numbers will crop your image while the negative numbers add blank space to your image. This filter allows you to resize the input image of your webcam by removing the top/bottom/left/right sides. How much will be determined by the numbers selected based on your interest.
Part 5. OBS Webcam Filters – Sharpen
This filter is one of the best filters I recommend everyone to use whenever they are recording. The application of this filter is, as the name implies, to sharpen the source image for more quality of your scene.
To add this filter to your webcam, do the following simple procedures, which are supported by figure depictions
Step 1. Under sources, go to your webcam > right-click on it > click on Filters
Step 2. Under effect filters, > click on the “+” sign > click on Sharpen>click on “ok”.
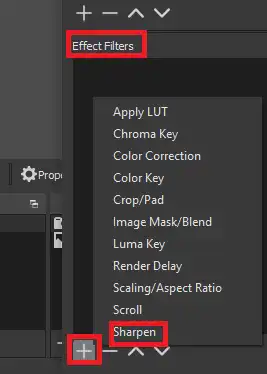
Step 3. After clicking OK, you will get the following window, and it lets you to adjust the sharpening settings on your image.
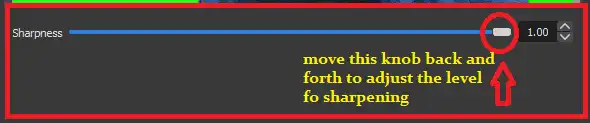
If the sharpening gain goes high, it will create a sawtooth at the edges of your image. On the other hand, if the magnitude of the sharpening goes too low, it will eliminate a few edges of your image. Consequently, the nominal values recommended are between 0.1 and 00.2.
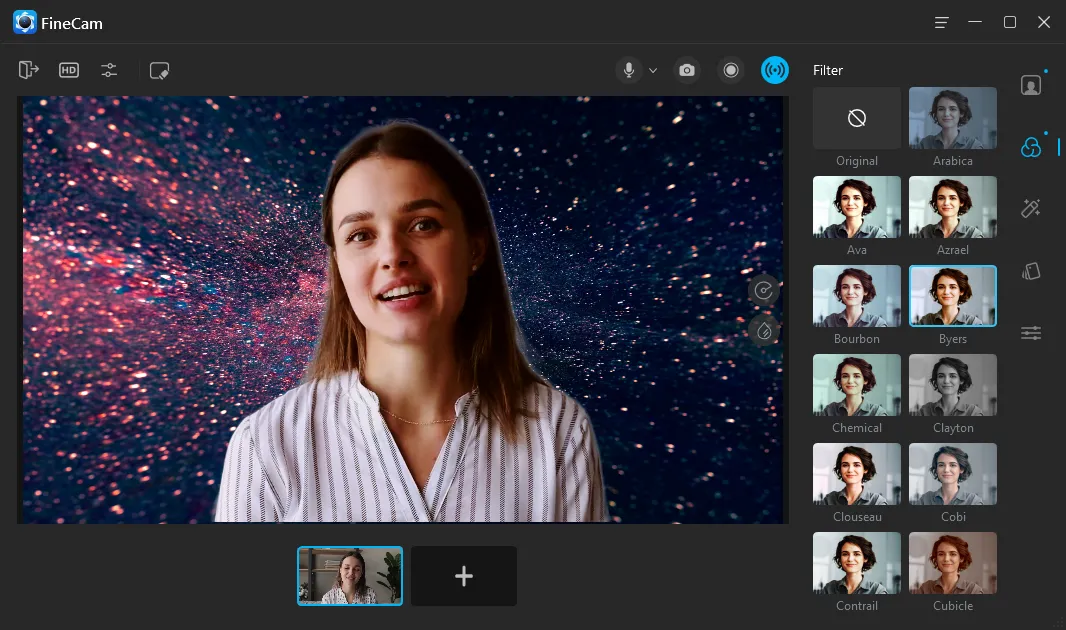
Bonus Tip: Add Webcam Filters & Effects within 1 Click
OBS filters allow you to adjust your webcam video to be better. However, you cannot preview what the filters exactly look like until you use them. So you have to try the filters one by one to know what each one look like.
In order to preview the filters in a better way, you may like to try our smart webcam software – FineCam, which enables you to preview and apply filters, effects, and backgrounds with 1 click. It helps you save a lot of time. Download the free ineCam for various webcam filters.
Conclusion
This article gives you everything about how to use OBS webcam filters and backgrounds to improve your video quality for your streaming and recording. You can also use FineCam as webcam source for OBS.