Are you looking for some ways to record the system audio of your computer? You may have tried the in-built voice recording programs on your computer like Windows Voice Recorder and Mac Quicktime Player.
Unfortunately, they are good at capturing the voice from the microphone but not for audio from the computer by default. Don’t worry. There are other effective approaches to recording audio from your computer.
Read on to get the 4 best ways to record audio from your Windows PC and Macbook. We will give you both voice recorder apps and an online voice recorder.
How to Record Audio from Computer with FineVoice
The first method for you is a free voice software named FineVoice. FineVoice is a free multi-track voice recorder for PC. More than a voice recorder, FineVoice also features a real-time voice changer, voice generator, speech-to-text and audio extractor, and audio file voice changer.

Try Multi-Track Voice Recorder for Free
- Record ideal voiceovers for videos, films, and e-learnings.
- Record from microphone, computer, iPhone, audio files, and streaming audio at the same time.
- Use 30+ voice effects and 28 audio effects to make professional audiobooks, podcasts, and songs.
- Various recording modes such as mix, separate, and bridge recording.
- Automatically saving recording files and projects for better project management.
How to record PC audio with FineVoice:
Step 1: Download FineVoice on your Windows PC.
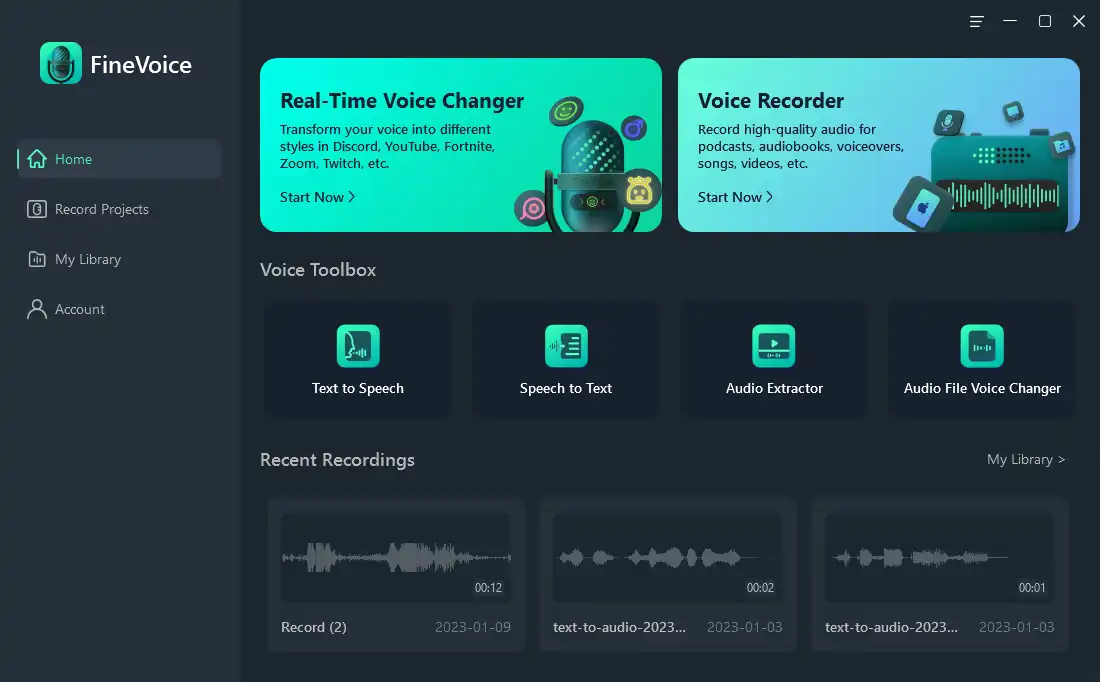
Step 2: Launch FineVoice and click the Voice Recorder button on the main interface.

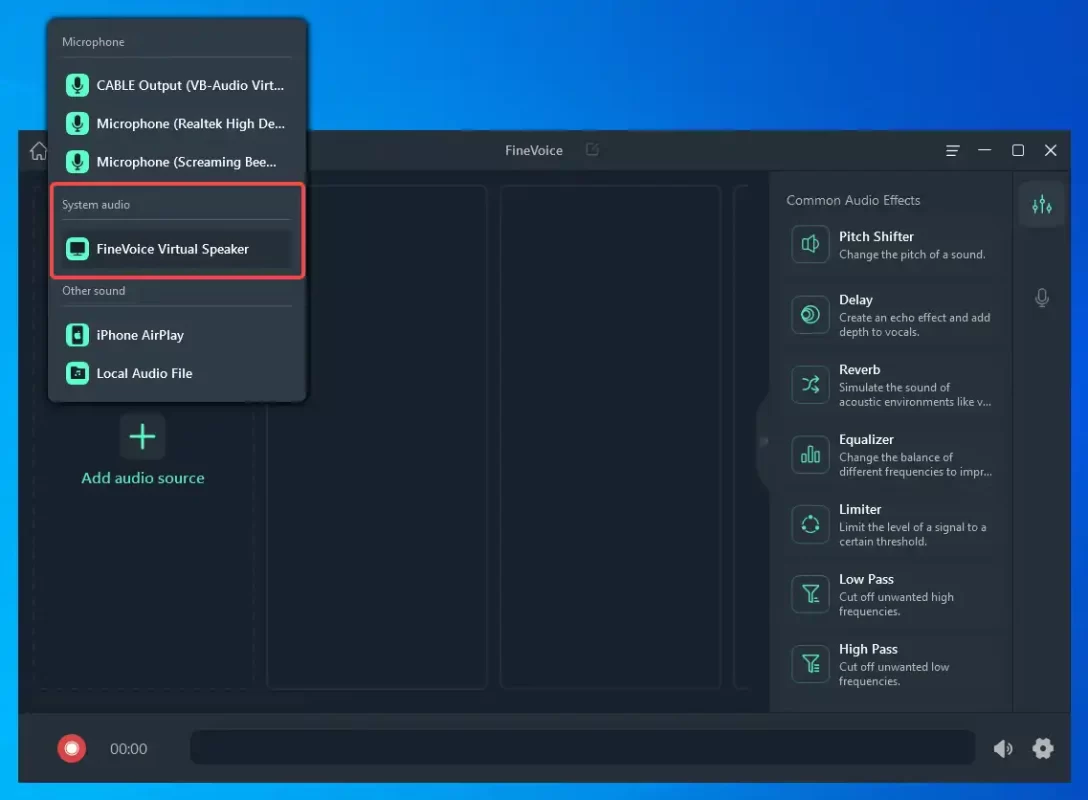
Step 3: Click Add audio source to add audio sources for recording. To record internal audio from your computer, select FineVoice Virtual Speaker under System audio.
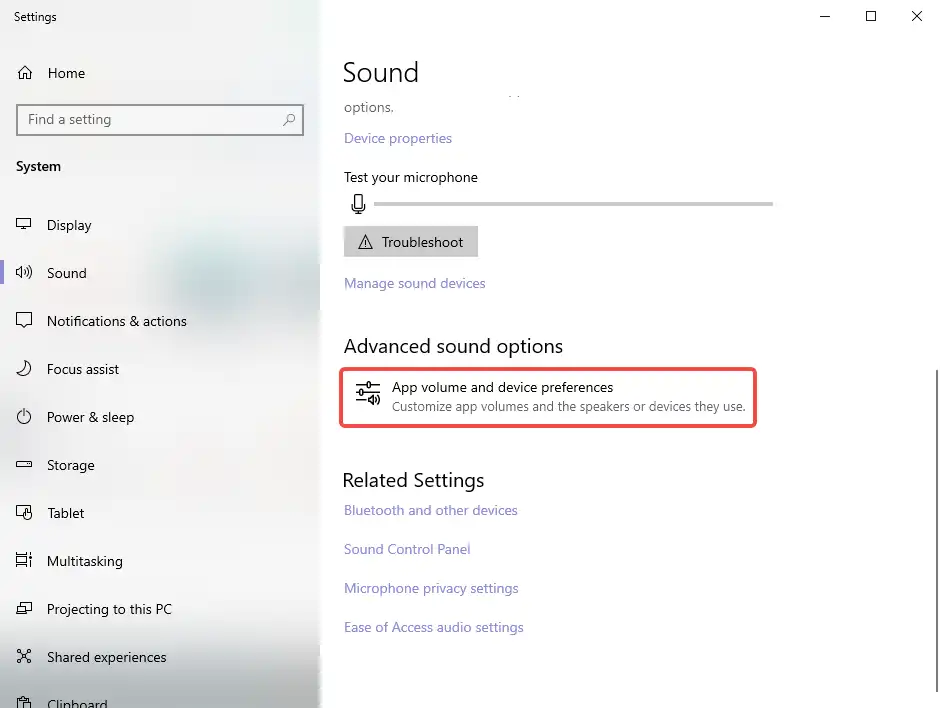
Step 4: If you want to record sounds from certain apps. Go to Windows System Settings > Sound. Scroll down to find Advanced sound options, and click App volume and device preferences.
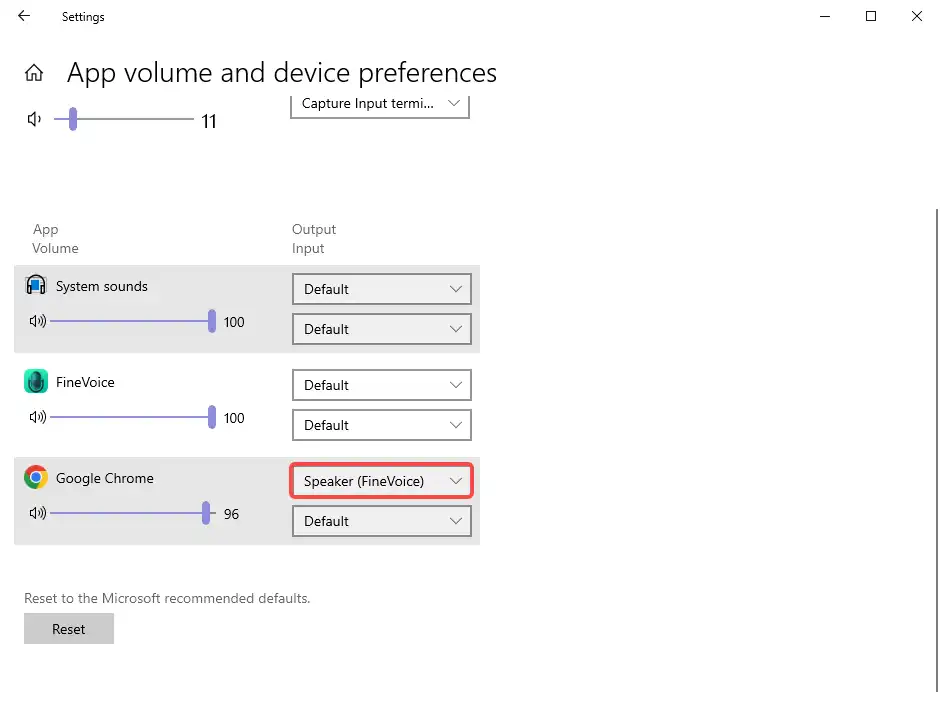
Step 5: You will see the apps using voice in the App list. Choose the app you want to capture sounds from and select FineVoice as the output device.
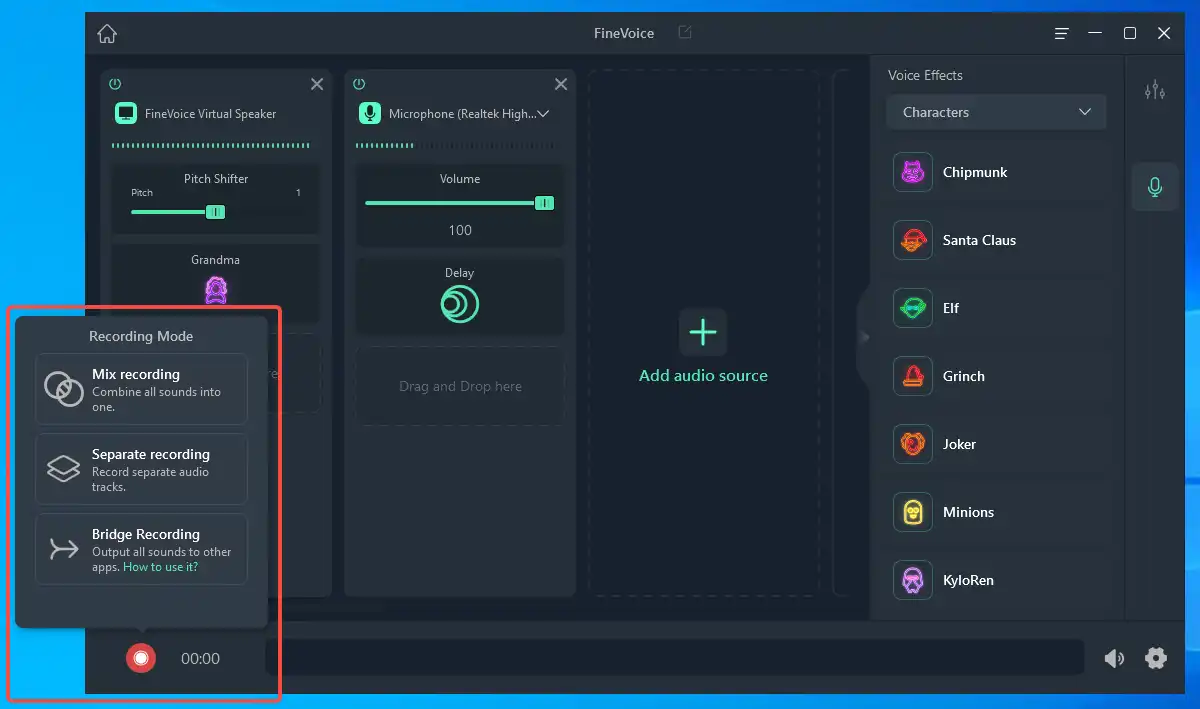
Step 6: Go back to FineVoice, the volume level bar tells you FineVoice is capturing sounds.
Step 7: You can add audio effects and voice effects to make the voice funny. Click the red Record button and choose a recording mode.
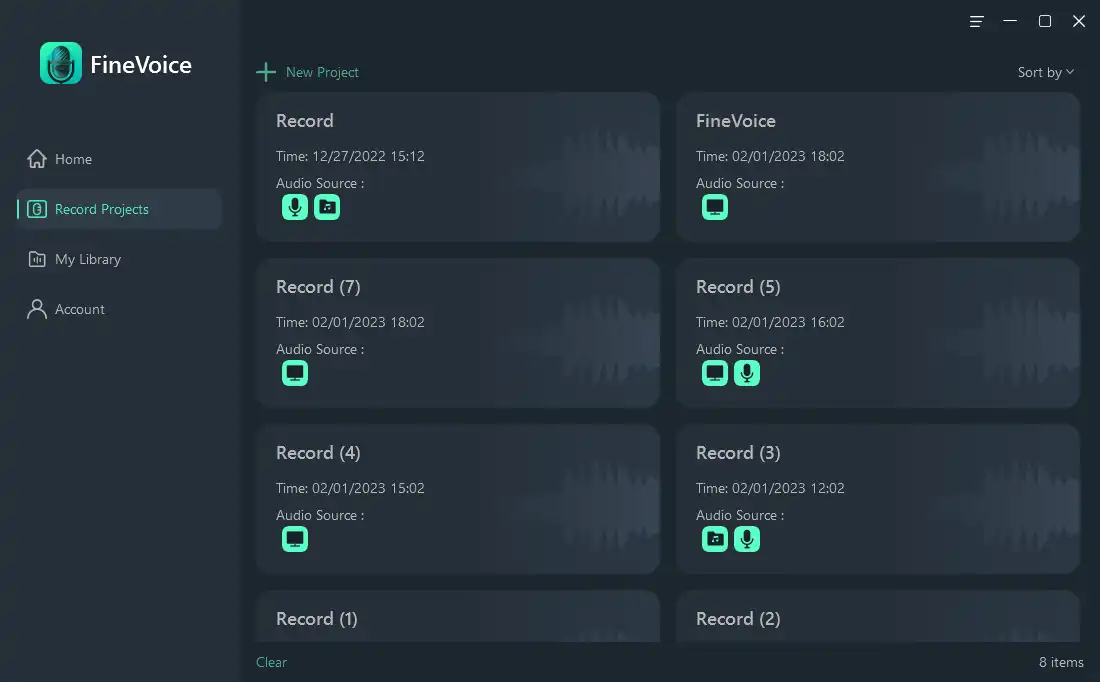
Step 8: Click the Stop button to save the audio file automatically in your local file. And you can check the audio in FineVoice My Library.
When you go back to the FineVoice main interface, it will ask if you want to save this project. A yes answer will save the project in Record Projects.
How to Record Audio from Computer with Audacity
FineVoice is a great multi-track voice recording software, but its only weakness is that it only supports Windows now. Is there any voice recorder that captures Mac audio?
Audacity is the one you need. Have you used this audio editing software? It can remove background noise from audio, change the audio file voice, and it is a powerful voice recorder.
You can choose to capture your microphone audio or internal computer audio. Recording audio from Macbook may be a little bit tricky. There are two methods to do so.
The first one is using an audio cable, second is getting the help of an add-on for Mac computers to record audio playing on the computer. Let’s walk you through the simple and effective loopback cable method.
How to record audio from Mac with Audacity:
Step 1: Download Audacity from its official website. Install Audacity on your Macbook.
Step 2: You need a loopback cable with a stereo mini-plug (1/8″) at each end. Plug one end into the line-in (microphone) jack and the other end into the line-out (headphone) jack.
To do this, you will connect the line input port to the headphone output port, and you will stop hearing what is playing on your Macbook.
Step 3: Go to Apple Menu > System Preferences> Sound preferences panel.
Step 4: Click on the Output tab and select “Line Out” from the “Choose a device for sound output” list. And choose “Line Input” from the “Choose a device for sound input” list on the Input tab.
Step 5: Play sound on any app. And adjust the Input volume slider to make the sound volume acceptable. Close the System Preferences window.
Step 6: Start Audacity. Find Device Toolbar, and select Built-in Input or similar as Recording Device.
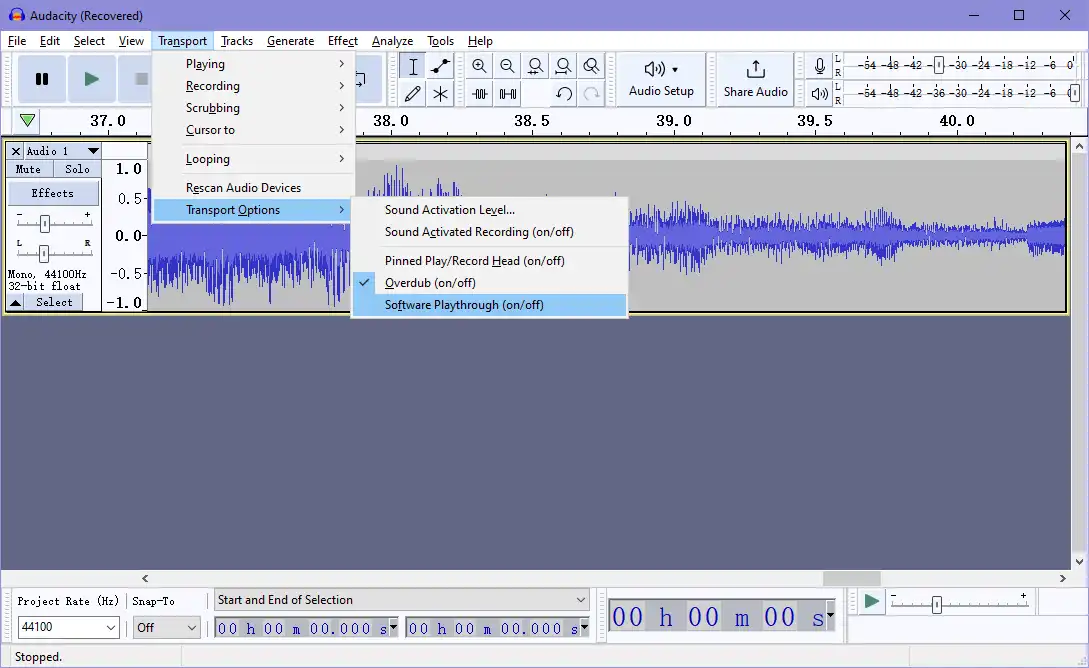
Step 7: Click on the Transport menu. Check Transport Options to make sure Software Playthrough is disabled.
Step 8: Click the Record (red circle) button to start recording. And play the sound you want to record. Click the Stop button to stop recording.
All system alert sounds will be recorded using this method. So, make sure you quit applications that may make an alert sound while recording.
You can also use Audacity to record audio from a PC, let’s check it.
How to record audio from PC with Audacity:
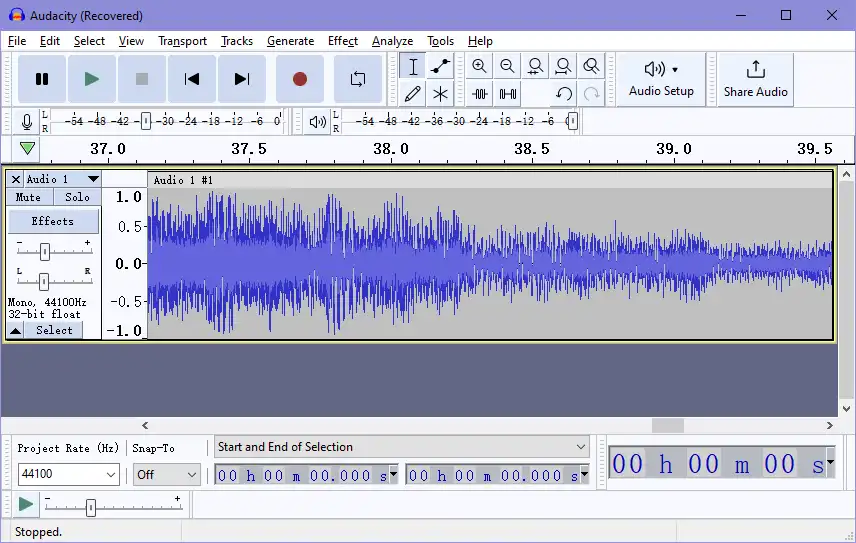
Step 1: Install Audacity on your Windows PC.
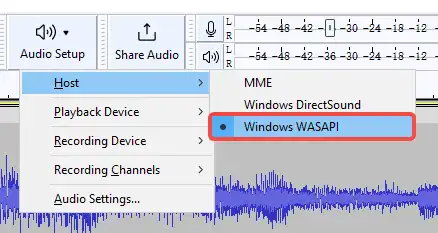
Step 2: Click on the Audio Setup button to select your preferred Audio Host and Recording Device from the dropdown menus.
- Select Windows WASAPI as the Audio Host to make Audacity record sound from other apps.
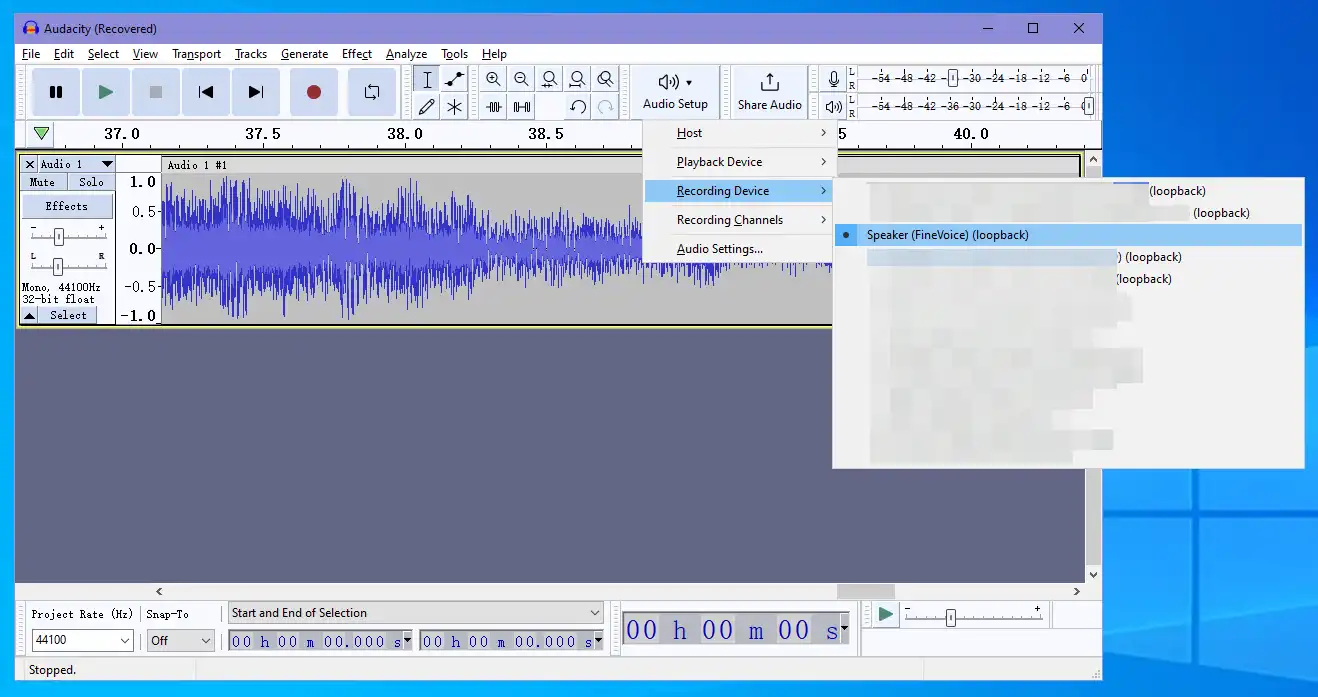
- Click Recording Device and select the Speaker (loopback) to capture internal without external audio.
Step 3: Find the Transport menu and make sure Software Playthrough is off.
Step 4: Click the red Record button to record sound and go to any app to play the audio. Click the Stop button to stop recording.
Step 5: Switch the Audio Host to MME and play the recorded audio in Audacity.
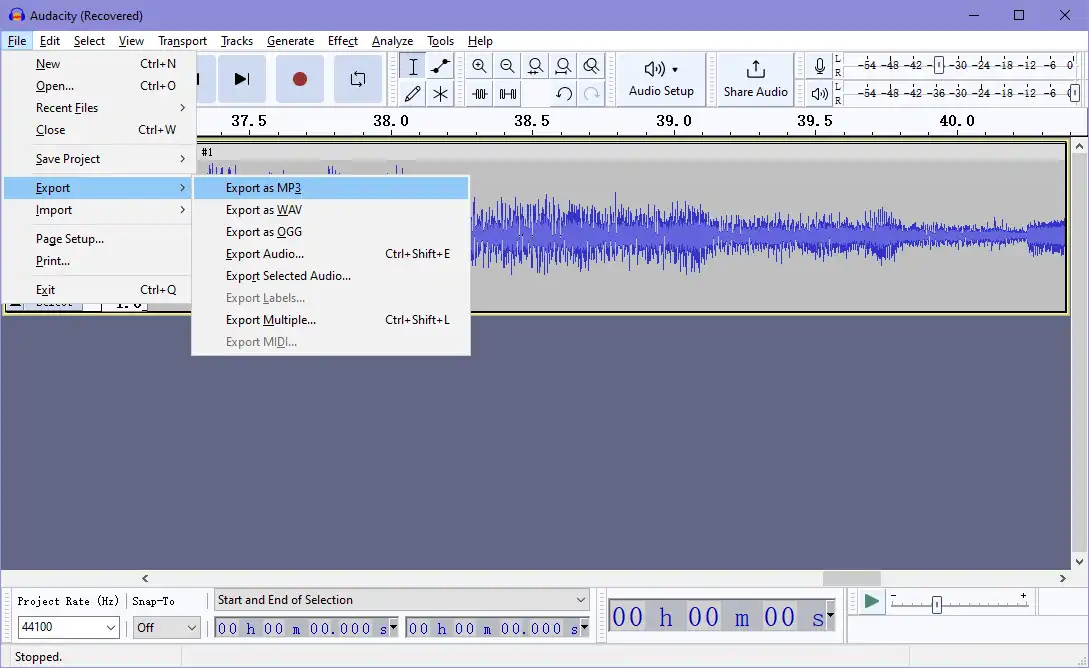
Step 6: Save the recorded audio by clicking File > Export and select your desired format to export the audio as.
How to Record Audio from Computer with OBS
Another choice to record desktop audio is Open Broadcaster Software. This free and open-source software works seamlessly on Windows, macOS, and Linux.
It is popular for live streaming on Discord, Twitch, and YouTube. Moreover, it captures and mixes your video and audio in real time. OBS records videos with audio by default, but it’s easy to convert video to audio.
How to record the audio from your computer with OBS:
Step 1: Download and install the latest version of OBS on your computer.
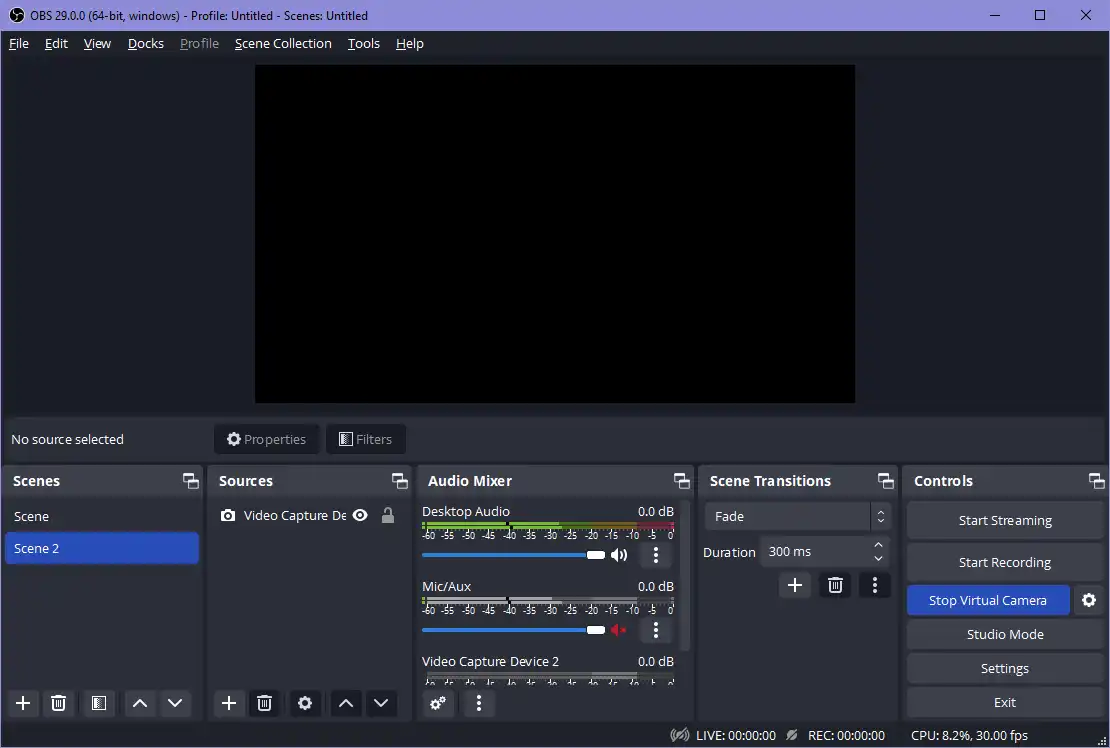
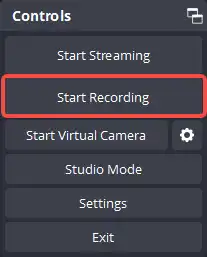
Step 2: Launch OBS and you can see the Audio Mixer section at the bottom of the interface.
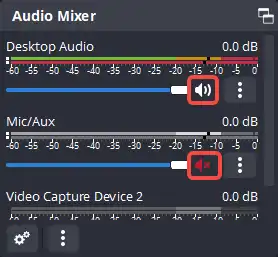
Step 3: Check the Desktop Audio input and make sure the volume is turned up. At the same time, mute the microphone audio volume so you don’t record the sound from a microphone.
Step 4: Click Start Recording to capture all sounds from your computer. Click the Step Recording button that replaces the Start Recording button.
Step 5: View the recorded video in C:\Users\(YourUserName)\Videos. You can use the FineVoice audio extractor to extract audio from video.
How to Record Audio from Computer with Online Tool
Don’t want to download any software? An online voice recorder can save you time, although most online tools are single-function tools. Want to record computer audio, you can try Screen Capture.
How to record desktop audio with Screen Capture:
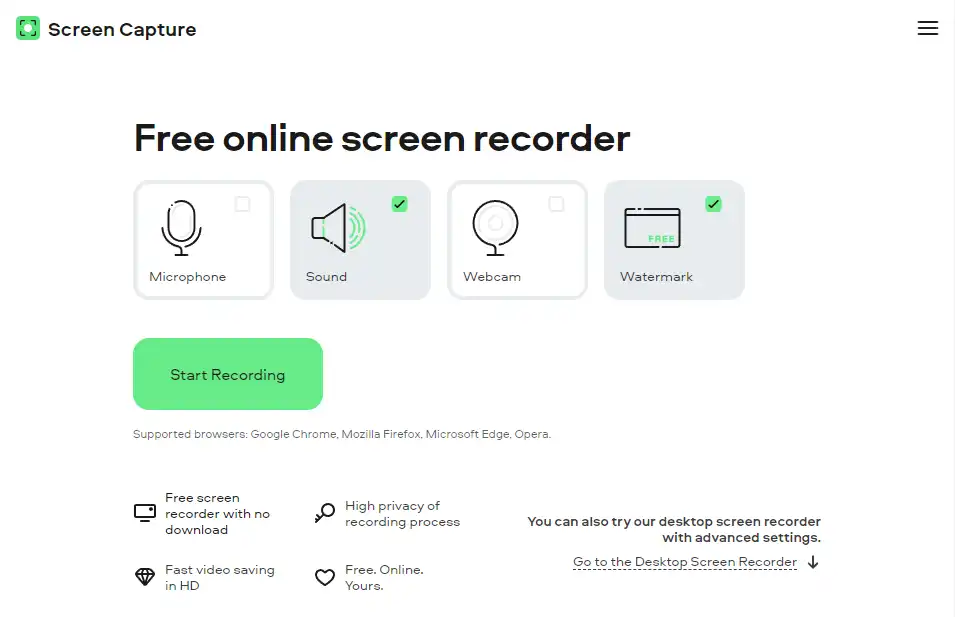
Step 1: Visit https://www.screencapture.com/.
Step 2: Select the Sound option to record audio from your computer. Make sure the Microphone option is unchecked.
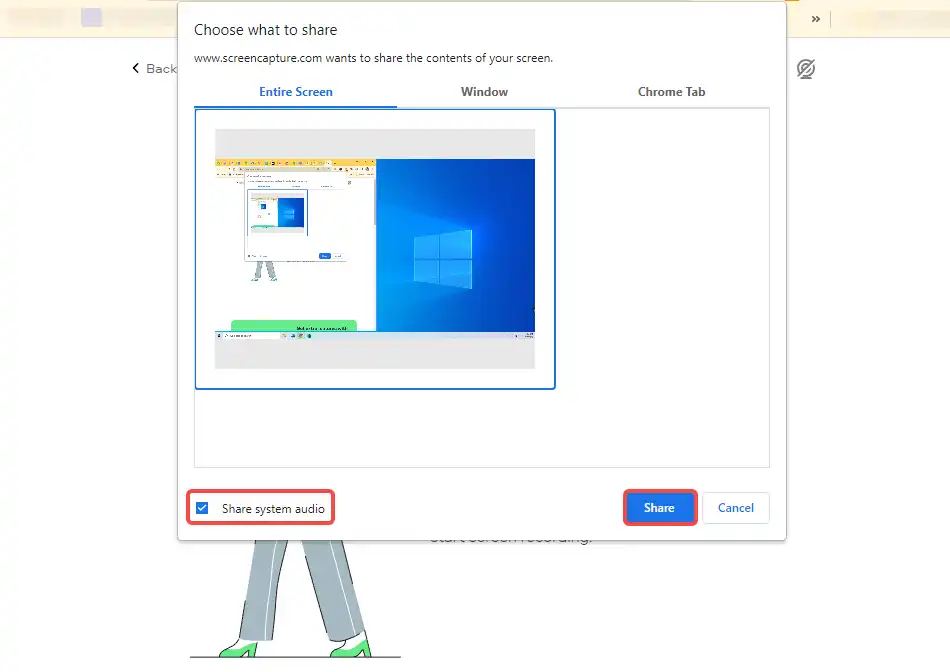
Step 3: Click the green Start Recording button to open the recording setting window. Choose what to share and check the Share system audio. Click Share to start recording.
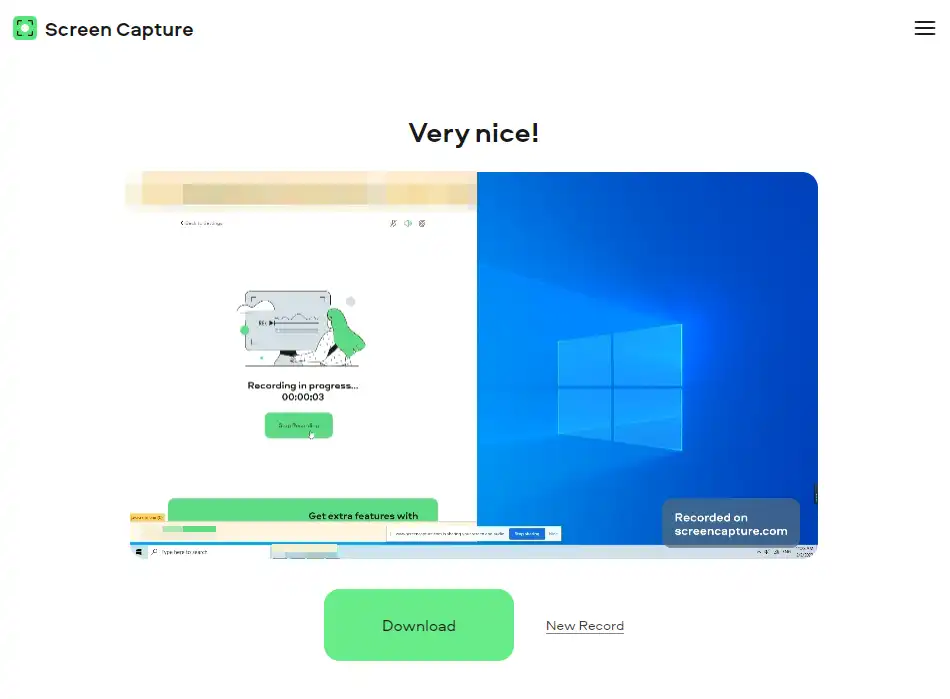
Step 4: Click Stop Recording to finish recording and preview the recording video. If you feel OK with the audio, click Download to download the MP4 file.
Conclusion
If you have some questions about how to record audio from a computer or in other words how to record computer internal audio, this post will help you out.
We give you the 4 best ways to record audio from a computer, no matter what the operating system of your computer is, you can find an effective method. Grab them and take them away – FineVoice.
Use this free software to record multi-track audio for your videos, audiobooks, and e-learnings, and change your voice in real time for your streaming, gaming, and voice chatting.
Try FineVoice for Free
FineVoice can record all sounds from computers, iPhones, microphones, apps, etc. It also supports separate recording, mix recording and offers you audio effects to tune your voice. Get it for free.